
Playwright Form Testing: Day 4 Tutorial
Day 4 of the 21-Day Playwright + TypeScript series
🎭 Want to master this with real projects? Join the Playwright Automation Mastery course at The Testing Academy.
Playwright form testing is where automation starts to look like real user behavior. Login pages, signup flows, checkout screens, search filters, support tickets, profile updates, file uploads, and consent forms all break when tests treat forms like static HTML instead of product workflows.
In Day 1 we set up the project. In Day 2 we fixed locators and assertions. In Day 3 we covered actions and auto-waiting. Today we use those pieces to build stable Playwright form testing with TypeScript.
Table of Contents
- Why Forms Break Automated Tests
- Project Setup for Day 4
- Playwright Form Testing for Text Inputs
- Selects, Checkboxes, and Radio Buttons
- File Uploads in Playwright
- Validation Errors and Negative Scenarios
- Reusable Form Helpers in TypeScript
- Screenshot Notes and Debugging
- Common Pitfalls I See in Teams
- Key Takeaways
- FAQ
Contents
Why Forms Break Automated Tests
Most flaky UI suites fail around forms. That is not because forms are hard. It is because teams automate forms at the wrong level.
I often see tests that click a label, type into the first input, submit, and then sleep for 3 seconds. The test passes on a developer laptop and fails in CI when the browser is slower, the validation request takes longer, or the frontend framework re-renders the field.
The form is a workflow, not a collection of fields
A real form test checks the user goal. For a signup form, the goal is not “type email”. The goal is “a user can create an account when the required fields are valid, and the app rejects bad data with useful errors”.
That shift changes how you write tests. You stop writing one giant script that touches every field. You split the workflow into smaller scenarios:
- Happy path with valid data.
- Required field validation.
- Invalid email or phone format.
- Duplicate user or server-side validation.
- File upload success and file type rejection.
- Keyboard-only interaction for accessibility.
What the official docs confirm
The Playwright Actions guide lists direct support for text inputs, checkboxes, radio buttons, select options, keyboard shortcuts, file uploads, focus, drag and drop, and mouse actions. That matters because we should use the native Playwright APIs before writing custom JavaScript.
The npm registry currently shows @playwright/test at version 1.60.0, and the npm downloads API reported 158,464,929 downloads for @playwright/test from 2026-05-04 to 2026-06-02. The ecosystem is not niche anymore. QA teams in India, product companies, and service companies are all adding Playwright skills to SDET expectations.
Today’s target
By the end of this tutorial, you will have a clean pattern for Playwright form testing that covers:
- Text fields with
fill()andpressSequentially(). - Select dropdowns with
selectOption(). - Checkbox and radio states with assertions.
- File uploads with
setInputFiles(). - Validation errors without fixed waits.
- Reusable TypeScript helpers for test data.
Project Setup for Day 4
If you completed Day 1 of this series, you already have the Playwright TypeScript project. If not, create a fresh one:
npm init playwright@latest playwright-form-testing
cd playwright-form-testing
npx playwright test --version
Keep the default TypeScript setup. I use Chromium first while building the test, then run all projects after the flow is stable.
Create a test data file
Forms need data. Hardcoding strings inside every test makes maintenance painful. Create tests/data/users.ts:
export type SignupUser = {
  firstName: string;
  lastName: string;
  email: string;
  password: string;
  country: string;
  newsletter: boolean;
  role: 'qa' | 'developer' | 'manager';
};

export const validUser: SignupUser = {
  firstName: 'Asha',
  lastName: 'Rao',
  email: `asha.rao.${Date.now()}@example.com`,
  password: 'SecurePass#2026',
  country: 'IN',
  newsletter: true,
  role: 'qa',
};
The timestamp keeps the email unique. For production test suites, I prefer a small test data builder, but this is enough for Day 4.
Add stable locators first
Before writing the test, inspect the form. Prefer labels, roles, and accessible names. If the app has poor labels, raise that as a product quality bug. Testability and accessibility usually improve together.
From Day 2 on locators and assertions, the locator priority still applies:
getByRole()for buttons, links, radios, and checkboxes.getByLabel()for form fields.getByPlaceholder()only when placeholders are stable.getByTestId()for complex custom controls.- CSS only when the DOM is stable and semantic locators are not enough.
Playwright Form Testing for Text Inputs
The most common Playwright form testing mistake is using type() everywhere. In current Playwright practice, fill() is the default for setting an input value. Use keyboard-style typing only when you are testing key events, masks, debounced search, or autocomplete behavior.
Use fill for normal fields
Here is a clean signup test skeleton:
import { test, expect } from '@playwright/test';
import { validUser } from './data/users';

test('user can complete the signup form', async ({ page }) => {
  await page.goto('/signup');

  await page.getByLabel('First name').fill(validUser.firstName);
  await page.getByLabel('Last name').fill(validUser.lastName);
  await page.getByLabel('Email').fill(validUser.email);
  await page.getByLabel('Password').fill(validUser.password);

  await expect(page.getByLabel('Email')).toHaveValue(validUser.email);
});
fill() clears the existing value and sets the new one. That is perfect for most form fields. It also keeps tests fast because it does not simulate every keypress.
Use keyboard input only when behavior depends on keys
Some fields behave differently when the user types. Think of OTP inputs, credit card masks, search suggestions, and fields that validate on each keyup event. For those cases, use pressSequentially():
test('search suggestions appear while typing', async ({ page }) => {
  await page.goto('/products');

  const search = page.getByRole('searchbox', { name: 'Search products' });
  await search.pressSequentially('wireless mouse', { delay: 40 });

  await expect(page.getByRole('option', { name: /wireless mouse/i })).toBeVisible();
});
I do not add the delay to make the test “more human”. I add it only when the component needs separate key events. If the component works with fill(), use fill().
Test keyboard submission
Forms should work with Enter when the focused field supports submission. This catches small accessibility and frontend regressions.
test('login form submits with Enter', async ({ page }) => {
  await page.goto('/login');

  await page.getByLabel('Email').fill('qa@example.com');
  await page.getByLabel('Password').fill('CorrectHorseBattery#1');
  await page.getByLabel('Password').press('Enter');

  await expect(page).toHaveURL(/dashboard/);
});
No fixed wait is needed. URL assertions retry automatically until the timeout.
Selects, Checkboxes, and Radio Buttons
Dropdowns, checkboxes, and radios look simple until a component library replaces the native HTML control with a custom widget. First identify which type you have.
Native select elements
For a native <select>, use selectOption():
await page.getByLabel('Country').selectOption('IN');
await expect(page.getByLabel('Country')).toHaveValue('IN');
You can select by value, label, or index. I prefer value when the backend contract is stable, and label when the test is closer to user-facing behavior.
await page.getByLabel('Country').selectOption({ label: 'India' });
await page.getByLabel('Timezone').selectOption({ value: 'Asia/Kolkata' });
Checkboxes
Use check() and uncheck(). Do not click a checkbox blindly. A blind click toggles state, which means the same test can pass or fail depending on the initial state.
const newsletter = page.getByRole('checkbox', { name: 'Send me product updates' });

await newsletter.check();
await expect(newsletter).toBeChecked();

await newsletter.uncheck();
await expect(newsletter).not.toBeChecked();
Radio groups should be tested by accessible name. This also tells you whether screen readers can understand the control.
await page.getByRole('radio', { name: 'QA Engineer' }).check();
await expect(page.getByRole('radio', { name: 'QA Engineer' })).toBeChecked();
await expect(page.getByRole('radio', { name: 'Developer' })).not.toBeChecked();
If a radio label is not discoverable by role and name, fix the markup instead of hiding the issue with a brittle CSS selector.
Custom dropdowns
React Select, MUI, Ant Design, and other component libraries often render a custom dropdown. In that case, use roles if the component supports them:
await page.getByRole('combobox', { name: 'Country' }).click();
await page.getByRole('option', { name: 'India' }).click();
await expect(page.getByRole('combobox', { name: 'Country' })).toContainText('India');
If the component has poor roles, add a test id at the product level. Do not chain six CSS classes generated by a design system. That test will fail after the next dependency upgrade.
File Uploads in Playwright
File upload is one of the cleanest APIs in Playwright. You do not need to open the operating system file picker. Use setInputFiles() against the file input.
Create test files
Add a fixture file under tests/fixtures/resume.pdf or create a small file during the test. For simple validation, a text file is enough:
import path from 'path';
import { test, expect } from '@playwright/test';

test('user uploads a resume', async ({ page }) => {
  await page.goto('/careers/apply');

  const filePath = path.join(__dirname, 'fixtures', 'resume.pdf');
  await page.getByLabel('Upload resume').setInputFiles(filePath);

  await expect(page.getByText('resume.pdf')).toBeVisible();
});
Multiple files
For multi-file controls, pass an array:
await page.getByLabel('Upload screenshots').setInputFiles([
  'tests/fixtures/login-error.png',
  'tests/fixtures/payment-error.png',
]);

await expect(page.getByText('login-error.png')).toBeVisible();
await expect(page.getByText('payment-error.png')).toBeVisible();
Remove uploaded files
If the form supports removing a file, test that as a separate behavior. Do not hide it inside the happy path.
await page.getByRole('button', { name: 'Remove resume.pdf' }).click();
await expect(page.getByText('resume.pdf')).toBeHidden();
The official Playwright docs also support setting file payloads from memory. That helps when you need a generated file without storing fixtures in Git.
await page.getByLabel('Upload report').setInputFiles({
  name: 'qa-report.txt',
  mimeType: 'text/plain',
  buffer: Buffer.from('Playwright upload test file'),
});
🚀 Level Up Your Playwright
From locators to CI pipelines — build a production-grade Playwright + TypeScript framework step by step.
Validation Errors and Negative Scenarios
A form suite that only tests happy paths is weak. Users make mistakes. Attackers send invalid input. Browsers behave differently. Good Playwright form testing includes negative scenarios without becoming a 200-test monster.
Required field validation
Start with the required fields. Submit the form empty and assert the visible errors:
test('signup form shows required field errors', async ({ page }) => {
  await page.goto('/signup');

  await page.getByRole('button', { name: 'Create account' }).click();

  await expect(page.getByText('First name is required')).toBeVisible();
  await expect(page.getByText('Email is required')).toBeVisible();
  await expect(page.getByText('Password is required')).toBeVisible();
});
Keep the assertions specific. A generic “error exists” check is easy to satisfy with the wrong message.
Invalid email format
Use a small table when testing several invalid inputs. This avoids copy-paste noise.
const invalidEmails = ['qa', 'qa@', '@example.com', 'qa@example'];

for (const email of invalidEmails) {
  test(`rejects invalid email: ${email}`, async ({ page }) => {
    await page.goto('/signup');
    await page.getByLabel('Email').fill(email);
    await page.getByRole('button', { name: 'Create account' }).click();

    await expect(page.getByText('Enter a valid email address')).toBeVisible();
  });
}
In a real CI suite, I keep this list short. One browser-level format test and one server-level validation test are often enough.
Server-side validation
Some validation happens after the API call. For example, duplicate email detection. Do not use waitForTimeout(). Wait for the UI state or the network response.
test('shows duplicate email error', async ({ page }) => {
  await page.goto('/signup');

  await page.getByLabel('First name').fill('Asha');
  await page.getByLabel('Last name').fill('Rao');
  await page.getByLabel('Email').fill('existing.user@example.com');
  await page.getByLabel('Password').fill('SecurePass#2026');

  const responsePromise = page.waitForResponse(response =>
    response.url().includes('/api/signup') && response.status() === 409
  );

  await page.getByRole('button', { name: 'Create account' }).click();
  await responsePromise;

  await expect(page.getByText('Email already exists')).toBeVisible();
});
This pattern connects the UI assertion to the real backend behavior. It is especially useful in product companies where frontend and backend teams ship independently.
Reusable Form Helpers in TypeScript
After five form tests, you will notice repetition. Repetition is fine while learning. In a real suite, move repeated form actions into helpers or page objects. Do not abstract too early.
A simple helper function
For Day 4, start with a helper function:
import { Page } from '@playwright/test';
import { SignupUser } from '../data/users';

export async function completeSignupForm(page: Page, user: SignupUser) {
  await page.getByLabel('First name').fill(user.firstName);
  await page.getByLabel('Last name').fill(user.lastName);
  await page.getByLabel('Email').fill(user.email);
  await page.getByLabel('Password').fill(user.password);
  await page.getByLabel('Country').selectOption(user.country);

  if (user.newsletter) {
    await page.getByRole('checkbox', { name: 'Send me product updates' }).check();
  } else {
    await page.getByRole('checkbox', { name: 'Send me product updates' }).uncheck();
  }

  await page.getByRole('radio', { name: 'QA Engineer' }).check();
}
Now the test reads like a business flow:
test('user can sign up with valid details', async ({ page }) => {
  await page.goto('/signup');
  await completeSignupForm(page, validUser);
  await page.getByRole('button', { name: 'Create account' }).click();

  await expect(page.getByRole('heading', { name: 'Welcome, Asha' })).toBeVisible();
});
When to use a page object
Use a page object when the page has many repeated actions across multiple specs. Keep it thin. A page object should not hide assertions that matter to the test.
export class SignupPage {
  constructor(private readonly page: Page) {}

  async open() {
    await this.page.goto('/signup');
  }

  async fillForm(user: SignupUser) {
    await completeSignupForm(this.page, user);
  }

  async submit() {
    await this.page.getByRole('button', { name: 'Create account' }).click();
  }
}
In interviews, many SDETs overcomplicate page objects. Keep the model boring. Boring test architecture is easier to debug at 2 AM when CI is red.
Screenshot Notes and Debugging
Since this is a tutorial article, here are the screenshots I would capture for a lesson video or course page. These screenshot descriptions also help you create your own notes while practicing.
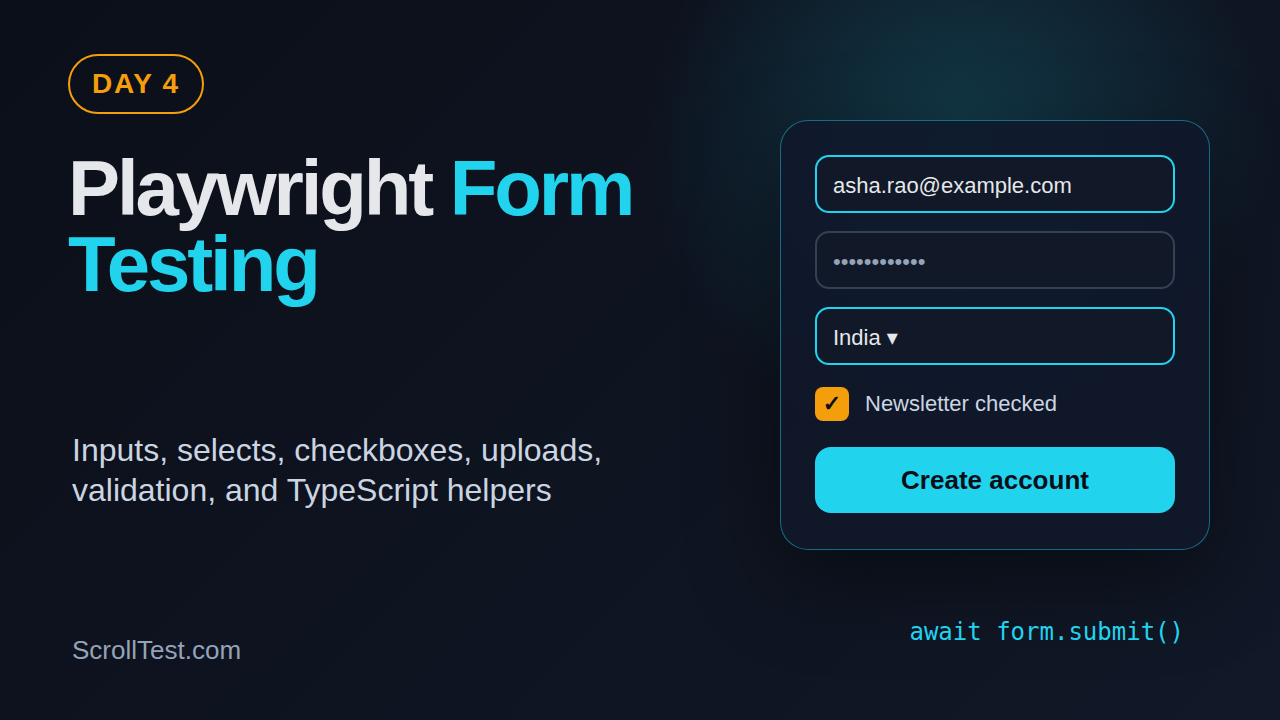
Screenshot 1: Form before submission
Capture the signup form with empty fields. Highlight labels, required markers, and the submit button. The teaching point is simple: good tests start with user-visible labels, not DOM guesses.
Screenshot 2: Validation errors after submit
Capture the form after clicking “Create account” with empty fields. Highlight each error message. This is a good visual proof that assertions should check exact messages, not only a red border.
Screenshot 3: Trace viewer after a failed upload
Run the test with trace enabled:
npx playwright test tests/signup.spec.ts --trace on
npx playwright show-report
Open the failed test and inspect the action timeline. The trace viewer shows the DOM snapshot, network calls, console messages, and screenshots. For a deeper debugging habit, pair this with the official Playwright Trace Viewer guide.
Screenshot 4: Successful form submission
Capture the final welcome page or success toast. This screenshot tells the learner what “done” looks like. It also helps reviewers quickly verify that the test checks the business outcome.
Common Pitfalls I See in Teams
These are the mistakes I see when teams move from Selenium habits to Playwright TypeScript.
Pitfall 1: Using waitForTimeout after submit
Fixed waits make suites slow and flaky. Replace them with URL assertions, visible text assertions, or response waits.
// Weak
await page.waitForTimeout(3000);

// Better
await expect(page.getByText('Account created successfully')).toBeVisible();
Pitfall 2: Clicking checkboxes instead of setting state
click() toggles. check() sets the state. When state matters, use check() and uncheck().
Pitfall 3: Testing every validation rule in UI
Do not put 80 validation cases in the browser if most of them belong in API or unit tests. Browser tests are valuable but expensive. Keep Playwright focused on user flows, integration points, and critical UI behavior.
Pitfall 4: Ignoring accessibility names
If getByLabel() and getByRole() do not work, the product may have accessibility issues. This is not only a test automation problem. It is a user problem.
Pitfall 5: Hiding bad test data
Random data can hide bugs. Use clear test data for most cases. Use generated data only where uniqueness is required, such as email addresses.
Pitfall 6: Making helpers too clever
A helper that fills 25 optional fields based on a giant object becomes a second application. Keep helpers readable. If a junior SDET cannot understand the helper in 2 minutes, simplify it.
Key Takeaways
Playwright form testing becomes stable when you treat forms as user workflows and use the right API for each control.
- Use
fill()for normal text input andpressSequentially()only when key events matter. - Use
selectOption()for native dropdowns and role-based clicks for custom dropdowns. - Use
check()anduncheck()instead of blind checkbox clicks. - Use
setInputFiles()for file uploads. Do not automate the OS picker. - Assert validation messages and final outcomes. Avoid fixed waits.
- Move repeated form steps into small TypeScript helpers after the pattern is clear.
For Day 5, the natural next step is navigation and multi-page flows. Once forms work, we need to test what happens after submit: redirects, dashboard state, session storage, and cross-page assertions.
FAQ
Should I use fill or type in Playwright?
Use fill() for normal text inputs. Use pressSequentially() when the component depends on real key events, such as autocomplete, masks, OTP fields, or debounced search.
How do I upload a file in Playwright?
Use setInputFiles() on the file input. You can pass a file path, multiple file paths, or an in-memory file payload with name, MIME type, and buffer.
How many form tests should I write?
Write enough to cover the critical user flow, required field validation, one or two important negative scenarios, and integration points. Move pure validation combinations to API or unit tests where possible.
What if my dropdown is not a native select?
Use role-based locators such as getByRole('combobox') and getByRole('option'). If the component has poor accessibility, add stable test ids and raise the accessibility issue with the team.
Is Playwright form testing useful for manual testers moving to automation?
Yes. Forms are a practical starting point because manual testers already understand login, signup, checkout, and validation flows. In India, I see many manual QA engineers use Playwright form tests as their first strong automation portfolio project.
🎓 Master Playwright End to End
Join hundreds of SDETs building real automation frameworks. Lifetime access, hands-on projects, and a job-ready portfolio.


