Playwright Actions and Auto-Waiting: Day 3 Tutorial
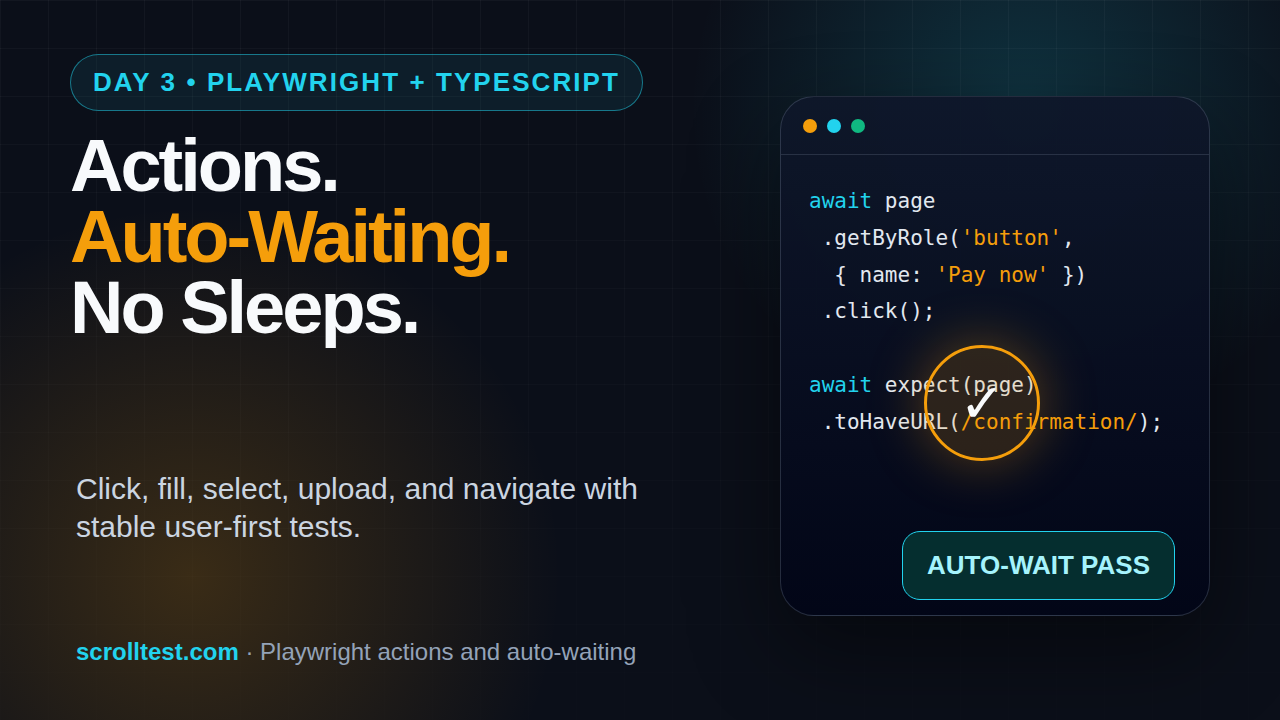
Table of Contents
🎭 Want to master this with real projects? Join the Playwright Automation Mastery course at The Testing Academy.
- What You Build on Day 3
- Playwright Actions and Auto-Waiting Explained
- The Actionability Checks Behind Every Click
- Core Playwright Actions You Use Daily
- Navigation After Actions Without Flaky Sleeps
- Hands-On Checkout Flow Test
- Debugging Actions in Trace Viewer
- Common Pitfalls I See in QA Teams
- Key Takeaways
- FAQ
Contents
What You Build on Day 3
Playwright actions and auto-waiting are the difference between a test that behaves like a real user and a test that passes only on your laptop. In Day 3 of this Playwright + TypeScript series, I want you to stop writing sleep-based scripts and start trusting Playwright’s action model.
Day 1 covered setup. Day 2 covered locators and assertions. Today we connect those two ideas with real browser actions: click, fill, check, select, upload, hover, keyboard input, and navigation after a user event.
The goal is simple: by the end, you can write a stable checkout-style test without adding waitForTimeout(3000) after every step. You also know when Playwright waits automatically, when it does not wait, and what to do when the page has async behavior that is not tied to a normal navigation.
If you missed the earlier lessons, keep these open in a second tab: Day 1 Playwright TypeScript setup and Day 2 Playwright locators and assertions. This tutorial builds directly on both.
Prerequisites
- Node.js installed and a Playwright TypeScript project created.
- Basic comfort with
test,expect, andpage. - A working test site or local app with forms, buttons, dropdowns, and links.
- VS Code with the Playwright extension if you want faster debugging.
Source notes for this lesson
I use the official Playwright documentation as the base source here. The Playwright auto-waiting docs state that Playwright performs actionability checks before actions and fails with a timeout if the checks do not pass. The Playwright input docs cover actions like click, fill, check, select, and file uploads. The Playwright navigation docs explain how Playwright waits for navigations caused by actions. I also checked current ecosystem signals: the Microsoft Playwright GitHub repository shows 90,697 stars, and npm reports 158,464,929 downloads for @playwright/test in the last month from 2026-05-04 to 2026-06-02. Those numbers explain why this is now a core SDET skill, not a side tool.
Playwright Actions and Auto-Waiting Explained
When a manual tester clicks a button, they wait naturally. They see the spinner, they see the button become enabled, they see the next page appear, and then they continue. Old Selenium-style automation often missed that human timing. The script clicked too early, typed into a hidden element, or asserted before the UI finished rendering.
Playwright actions and auto-waiting solve a large part of that problem. Before Playwright performs many user actions, it checks whether the target element is ready for that action. That sounds small, but it removes a lot of test noise.
What auto-waiting actually means
Auto-waiting does not mean Playwright magically understands your business flow. It means Playwright waits for technical readiness before performing an action.
For a normal click, Playwright checks that the locator resolves to one element, the element is visible, stable, receives events, and is enabled. If those checks pass, the click happens. If they do not pass within the timeout, Playwright throws a clear error instead of silently doing the wrong thing.
That is why this test usually does not need a manual sleep:
import { test, expect } from '@playwright/test';

test('opens account page from dashboard', async ({ page }) => {
  await page.goto('/dashboard');

  await page.getByRole('link', { name: 'Account' }).click();

  await expect(page).toHaveURL(/.*account/);
  await expect(page.getByRole('heading', { name: 'Account settings' })).toBeVisible();
});
The click waits for the link to be actionable. The assertion waits for the URL and heading. No fixed delay is needed.
What auto-waiting does not mean
Auto-waiting does not wait for every API call, every animation, or every state transition in your application. If a page updates a label after a background request, Playwright may not know the business meaning of that change. You still need a web-first assertion that describes the state you expect.
await page.getByRole('button', { name: 'Apply coupon' }).click();
await expect(page.getByText('Coupon applied')).toBeVisible();
await expect(page.getByTestId('order-total')).toContainText('₹899');
Notice the pattern. The action triggers behavior. The assertion waits for the result. This is the cleanest mental model for beginners and experienced SDETs.
The Actionability Checks Behind Every Click
The official Playwright docs call this actionability. I call it the reason your test does not panic-click a disabled button. Most flaky tests I review fail because the author treats the page like static HTML. Modern pages are not static. They render, hydrate, animate, fetch, disable, enable, and re-render.
The five checks to remember
You do not need to memorize the entire matrix, but you should know the checks that matter most for daily work:
- Unique target: the locator should resolve to exactly one element for actions that require one target.
- Visible: the element must be visible, not hidden behind CSS or conditional rendering.
- Stable: the element should not be moving because of animation or layout shift.
- Receives events: another element should not cover it.
- Enabled: disabled buttons and inputs should not receive normal user actions.
This is one reason I pushed locator discipline hard on Day 2. A weak locator gives Playwright a bad target. Auto-waiting cannot fix a bad target.
How actionability changes your code style
New automation engineers often write code like this:
await page.locator('#save').waitFor({ state: 'visible' });
await page.waitForTimeout(2000);
await page.locator('#save').click();
That code has two problems. The sleep is blind, and the selector is brittle. A better version describes the user action and expected result:
await page.getByRole('button', { name: 'Save changes' }).click();
await expect(page.getByText('Profile updated')).toBeVisible();
Use explicit waits only when you are waiting for something outside the normal action/assertion model. For example, waiting for a download event, a websocket message exposed in the UI, or a custom network response can be valid. Waiting because you are unsure is not valid.
When force is a smell
Playwright gives you force: true for actions like clicks. I use it rarely. If a click needs force, the test may be bypassing a real user constraint. Maybe a loader is covering the button. Maybe the button is disabled. Maybe your locator points to an icon inside the button instead of the button itself.
// Avoid this unless you have a clear reason.
await page.getByRole('button', { name: 'Pay now' }).click({ force: true });
Before using force, inspect the trace. A forced click can hide product bugs, especially in payment, checkout, and admin screens where disabled states matter.
Core Playwright Actions You Use Daily
Most web tests use a small group of actions. If you learn these well, you can automate 70-80% of normal business flows. The rest is file uploads, downloads, dialogs, network control, and advanced browser APIs, which we handle later in the series.
Use role-based locators when the element has a real user-facing role and name. This keeps your test close to how users and assistive technology understand the page.
await page.getByRole('button', { name: 'Login' }).click();
await page.getByRole('link', { name: 'Orders' }).click();
await page.getByRole('menuitem', { name: 'Delete' }).click();
For icons, ask the app team to add an accessible name. Do not settle for .icon-trash:nth-child(3) unless you enjoy maintaining broken tests every sprint.
Filling forms
For text fields, use fill. It clears the field and types the new value. Use pressSequentially only when you specifically need character-by-character typing behavior, such as testing autocomplete or keyboard events.
await page.getByLabel('Email').fill('qa.engineer@example.com');
await page.getByLabel('Password').fill('CorrectHorseBatteryStaple!');
await page.getByRole('button', { name: 'Sign in' }).click();

await expect(page.getByRole('heading', { name: 'Dashboard' })).toBeVisible();
For India-focused product teams, test local formats early. Phone numbers, GSTIN, PIN codes, and rupee currency fields often contain formatting rules that break basic automation scripts.
await page.getByLabel('Mobile number').fill('9876543210');
await page.getByLabel('PIN code').fill('560103');
await expect(page.getByTestId('shipping-charge')).toContainText('₹');Use semantic actions for form controls. They read better and fail better.
await page.getByLabel('I agree to the Terms').check();
await expect(page.getByLabel('I agree to the Terms')).toBeChecked();

await page.getByLabel('Payment method').selectOption('upi');
await expect(page.getByLabel('Payment method')).toHaveValue('upi');
For custom dropdowns built with divs, use roles if the component exposes them correctly:
await page.getByRole('combobox', { name: 'City' }).click();
await page.getByRole('option', { name: 'Bengaluru' }).click();
If this fails, do not blame Playwright first. Inspect the accessibility tree. Many custom components are visually rich but semantically poor.
Hover, keyboard, and file upload
Hover is useful for menus and tooltips, but do not overuse it for flows that users can access through visible buttons.
await page.getByRole('button', { name: 'Profile' }).hover();
await page.getByRole('menuitem', { name: 'Logout' }).click();
Keyboard actions help with shortcuts, search boxes, and accessibility checks:
await page.getByRole('searchbox', { name: 'Search products' }).fill('playwright');
await page.keyboard.press('Enter');
await expect(page.getByRole('heading', { name: /search results/i })).toBeVisible();
File uploads should target the input element, not the fancy upload card:
await page.getByLabel('Upload resume').setInputFiles('fixtures/resume.pdf');
await expect(page.getByText('resume.pdf')).toBeVisible();
Navigation is where many Playwright beginners get confused. They click a link, immediately assert something, and the test sometimes fails. The fix is not a sleep. The fix is to assert the navigation outcome or wait for the right event.
For normal links and buttons that navigate, this is enough:
await page.getByRole('link', { name: 'Pricing' }).click();
await expect(page).toHaveURL(/.*pricing/);
await expect(page.getByRole('heading', { name: 'Pricing' })).toBeVisible();
The assertion waits until the URL matches. The heading assertion waits until the new page renders. This is better than waiting for a generic load state because it checks what the user actually cares about.
When to use waitForURL
I use waitForURL when the next page matters but I do not need a full assertion block immediately.
await page.getByRole('button', { name: 'Continue' }).click();
await page.waitForURL('**/checkout/payment');

await expect(page.getByRole('heading', { name: 'Payment' })).toBeVisible();
Keep the pattern tight: action, URL wait, visible state assertion. Do not wait for URL and then skip the UI check.
When to use Promise.all
Older examples often used Promise.all to start waiting for navigation before clicking. In many modern Playwright flows, web-first assertions are enough. Still, for explicit events like downloads or popups, the pattern is useful because the event may fire immediately after the action.
const downloadPromise = page.waitForEvent('download');
await page.getByRole('button', { name: 'Download invoice' }).click();
const download = await downloadPromise;

expect(download.suggestedFilename()).toContain('invoice');
The important idea: start waiting before the click if the event can happen instantly.
🚀 Level Up Your Playwright
From locators to CI pipelines — build a production-grade Playwright + TypeScript framework step by step.
Hands-On Checkout Flow Test
Now let us build a realistic flow. This is not tied to one demo website. Treat it as a template for your app. Replace labels and routes with your own product names.
Test case
We will automate this scenario:
- Open the product page.
- Add a product to the cart.
- Open cart and verify item count.
- Fill shipping details.
- Select UPI as payment method.
- Place a test order.
- Assert the confirmation state.
Code example
import { test, expect } from '@playwright/test';

test.describe('checkout actions', () => {
  test('places a test order with UPI payment option', async ({ page }) => {
    await page.goto('/products/playwright-course');

    await expect(page.getByRole('heading', { name: /playwright course/i })).toBeVisible();
    await page.getByRole('button', { name: 'Add to cart' }).click();
    await expect(page.getByTestId('cart-count')).toHaveText('1');

    await page.getByRole('link', { name: 'View cart' }).click();
    await expect(page).toHaveURL(/.*cart/);
    await expect(page.getByText('Playwright Course')).toBeVisible();

    await page.getByRole('button', { name: 'Checkout' }).click();
    await expect(page).toHaveURL(/.*checkout/);

    await page.getByLabel('Full name').fill('Pramod Dutta');
    await page.getByLabel('Email').fill('pramod@example.com');
    await page.getByLabel('Mobile number').fill('9876543210');
    await page.getByLabel('Address').fill('HSR Layout, Bengaluru');
    await page.getByLabel('PIN code').fill('560102');

    await page.getByLabel('Payment method').selectOption('upi');
    await expect(page.getByTestId('payment-summary')).toContainText('UPI');

    await page.getByLabel('I agree to the Terms').check();
    await page.getByRole('button', { name: 'Place test order' }).click();

    await expect(page).toHaveURL(/.*order-confirmation/);
    await expect(page.getByRole('heading', { name: 'Order confirmed' })).toBeVisible();
    await expect(page.getByTestId('order-id')).toContainText('TEST-');
  });
});
This test has no fixed wait. Every wait is tied to a user-visible state: URL, heading, count, text, selected payment method, or order id. That is the standard I want you to follow in real projects.
Screenshot descriptions to capture
For your learning notes, capture these screenshots when you run the test:
- Screenshot 1: VS Code showing the checkout test with the action/assertion rhythm highlighted.
- Screenshot 2: Playwright Inspector paused on the
Add to cartclick, showing the selected role locator. - Screenshot 3: HTML report after the test passes, with the checkout test duration and browser project visible.
- Screenshot 4: Trace Viewer action timeline showing click, fill, select, check, and final assertion steps.
Debugging Actions in Trace Viewer
When an action fails, do not guess. Open the trace. This is one of the biggest productivity upgrades Playwright gives to QA teams.
Run with trace
In development, run a single spec with trace enabled:
npx playwright test tests/checkout.spec.ts --trace onThen open the report:
npx playwright show-reportClick the trace attachment. Look at the action timeline, before/after DOM snapshots, console logs, network calls, and the exact locator Playwright used.
What to inspect first
- Was the locator unique? If multiple elements matched, fix the locator.
- Was the element visible? If hidden, check conditional rendering or route state.
- Was another element covering it? Look for loaders, sticky headers, cookie banners, or modals.
- Was it disabled? Check whether the test skipped a required form field.
- Did the app navigate? If yes, assert the final URL and page heading.
This debugging habit connects to a broader cost problem. I wrote about wasted engineering time in Cost of Flaky Tests. A flaky test is not just one failed pipeline. It burns review time, rerun time, and trust in automation.
Use trial clicks for investigation
Playwright supports trial mode on some actions. A trial click performs actionability checks without actually clicking. I use it when debugging a stubborn element.
await page.getByRole('button', { name: 'Pay now' }).click({ trial: true });If the trial fails, the real click would fail too. The error usually tells you which actionability check did not pass.
Common Pitfalls I See in QA Teams
Playwright actions and auto-waiting can make your suite stable, but only if you stop fighting the framework. These are the mistakes I see most often when manual testers and Selenium engineers move into Playwright.
Pitfall 1: Adding waits after every action
This is the most common habit. The test fails once, someone adds three seconds, and the suite becomes slower forever.
// Bad
await page.getByRole('button', { name: 'Save' }).click();
await page.waitForTimeout(3000);

// Better
await page.getByRole('button', { name: 'Save' }).click();
await expect(page.getByText('Saved successfully')).toBeVisible();
If your team has 500 tests and each test has two unnecessary three-second sleeps, that is 50 minutes of wasted wait time in a serial run. Parallel execution reduces wall-clock time, but it does not remove the waste.
Pitfall 2: Clicking implementation details
Users click buttons, links, menu items, checkboxes, and labels. They do not click CSS classes. If your tests depend on utility classes or component internals, small UI refactors will break them.
// Bad
await page.locator('.btn.btn-primary.mt-4').click();

// Better
await page.getByRole('button', { name: 'Create account' }).click();
This also improves accessibility feedback. If the role locator cannot find the button by name, your product may have an accessibility problem worth fixing.
Pitfall 3: Ignoring async UI states
Some actions trigger background updates without navigation. Add an assertion that waits for the user-visible result.
await page.getByRole('button', { name: 'Refresh balance' }).click();
await expect(page.getByTestId('balance-status')).toHaveText('Updated');
await expect(page.getByTestId('wallet-balance')).toContainText('₹');
Do not assert too early. Do not sleep blindly. Assert the state that proves the action worked.
Pitfall 4: Using force to hide product bugs
If a button is covered by a loader, a user cannot click it. If your test uses force, it may pass while the real user experience is broken. This matters in teams that ship to production several times per day through CI/CD.
If you are building more advanced self-healing systems, read Self-Healing Selectors in 2026. The same warning applies there: healing should not hide product defects.
Key Takeaways
Playwright actions and auto-waiting help you write tests that match real user behavior, but they are not a license to stop thinking. Good Playwright code has a clear rhythm: locate the user-facing element, perform the action, assert the visible result.
- Playwright waits for actionability before common actions like click and fill.
- Auto-waiting checks technical readiness, not your business rule.
- Use web-first assertions to wait for the result of an action.
- Avoid fixed sleeps unless you are proving a time-based product behavior.
- Use Trace Viewer when actions fail; do not debug by guessing.
- Keep locators user-facing with roles, labels, text, and test IDs.
For tomorrow’s lesson, we will move into test hooks, fixtures, and reusable setup. That is where Playwright starts feeling like a real framework instead of a collection of scripts.
FAQ
Does Playwright auto-wait for every click?
Playwright performs actionability checks for normal click actions. It waits for the element to be ready within the configured timeout. If the element never becomes actionable, the test fails with an error.
Should I ever use waitForTimeout?
Rarely. Use it only when you are testing actual time-based behavior or doing temporary debugging. For product flows, prefer locator actions, URL assertions, event waits, and web-first assertions.
Assert the result. If submit navigates, assert the URL and heading. If it updates the same page, assert a success message, table row, toast, or field value that proves the submit worked.
The button may be covered by another element, disabled, moving because of animation, or matched by a bad locator. Open Trace Viewer and inspect the actionability error.
Is force click acceptable in automation?
Use force: true only when you understand the tradeoff. In most application tests, force click hides real user constraints and can mask bugs.
🎓 Master Playwright End to End
Join hundreds of SDETs building real automation frameworks. Lifetime access, hands-on projects, and a job-ready portfolio.