Playwright TypeScript Setup: Day 1 Tutorial
Most Playwright failures I see in beginner teams do not start inside the test. They start on Day 1, when the project is created without a clean TypeScript setup, without config discipline, and without a simple rule for locators. This Day 1 guide fixes that. You will build a practical Playwright TypeScript setup that is small enough for a beginner, but structured enough for real SDET work.
🎭 Want to master this with real projects? Join the Playwright Automation Mastery course at The Testing Academy.
Table of Contents
- Why Playwright TypeScript Setup Matters
- What You Will Build Today
- Set Up Your Learning Environment
- Install Playwright With TypeScript
- Understand the Project Files
- Write Your First Real Test
- Configure Browsers, Reporters, and Traces
- Debug Like an SDET
- Common Pitfalls in Day 1 Setup
- Key Takeaways
- FAQ
Contents
Why Playwright TypeScript Setup Matters
A good setup is boring. That is the point. When your Playwright project is predictable, you spend your energy on testing behaviour instead of fixing broken imports, missing browsers, flaky waits, and unclear reports.
Microsoft’s Playwright documentation describes Playwright Test as an end-to-end framework that bundles the test runner, assertions, isolation, parallelization, and tooling. That matters because you are not stitching ten tools together on Day 1. You install one runner and get browser automation, assertions, traces, screenshots, HTML reports, and parallel execution in the same ecosystem.
The ecosystem is also large now. The Microsoft Playwright GitHub repository has more than 90,000 stars, and the @playwright/test package crossed 158 million npm downloads in the last month when I checked during this article research. Those numbers do not prove quality by themselves, but they prove one practical thing: this is not a niche toy. If you are a tester in India moving from manual testing to automation, Playwright + TypeScript is now a serious career skill.
Why I prefer TypeScript for this series
You can use Playwright with JavaScript, Python, Java, and .NET. For this 21-day series, I use TypeScript because it gives testers three benefits early:
- Autocomplete: You see available Playwright APIs while writing code.
- Type safety: Many mistakes are caught before the test even runs.
- Industry fit: Product teams using React, Angular, or Node often already use TypeScript.
If you work in a TCS, Infosys, Wipro, or service-company project, you may still see Selenium with Java everywhere. That skill is valuable. But product companies and modern QA teams increasingly expect testers to understand fast browser automation, CI reports, traces, and API-aware testing. Playwright TypeScript setup is a good starting point for that shift.
Internal reading before you continue
If you already know basic Playwright and want architecture later, bookmark Building a SOLID Playwright Framework. If network testing is your focus, keep Playwright Network Interception open for Day 12. If AI-assisted testing interests you, read MCP Servers for Testers: Playwright TypeScript QA Guide after finishing this foundation.
What You Will Build Today
Day 1 is not about building a huge framework. That is a common beginner mistake. You create folders, helpers, fixtures, page objects, test data files, CI files, and custom reporters before you have one stable test. Then the project becomes a museum of unused code.
Today you will build a lean project with four goals:
- Install Playwright with TypeScript.
- Run one browser test in Chromium, Firefox, and WebKit.
- Use a reliable locator and a real assertion.
- Generate a trace and HTML report you can share with your team.
Prerequisites
You need Node.js, npm, and a code editor. I prefer VS Code because the Playwright extension is useful, but the commands work in any terminal. Use a recent LTS version of Node. Do not mix multiple Node versions unless you already understand tools like nvm or fnm.
node --version
npm --version
Screenshot description: capture your terminal showing the Node and npm versions. This is useful when you debug setup issues with a mentor or colleague. A surprising number of Playwright setup problems come from old Node versions or a broken global npm setup.
Recommended folder
Create a clean workspace. Do not install Playwright inside an old Selenium project. You want a clean baseline.
mkdir playwright-ts-day-1
cd playwright-ts-day-1
Set Up Your Learning Environment
Before installation, make the environment easy to repeat. I want you to treat this like a professional repo, not a random practice folder. That means clear commands, a clean package file, and a project that another learner can clone without asking ten setup questions.
Create a Git checkpoint
Initialize Git before you install dependencies. This gives you a clean checkpoint and makes changes visible.
git init
git status
After Playwright is installed, commit the starter files. If something breaks later, you can compare the working setup with your changes.
git add .
git commit -m "day 1 playwright typescript setup"
Use local commands, not machine memory
A professional setup should not depend on commands you remember from your laptop. Put common commands in package.json. This helps new team members, CI systems, and your future self. It also helps in interviews because you can explain exactly how your suite runs.
What good looks like at the end
At the end of Day 1, your folder should have a Playwright config, a tests folder, a package file, a lock file, and a passing report. You should be able to delete node_modules, run npm install, run npm test, and get the same result. That repeatability is the difference between demo automation and engineering.
Keep one notebook entry for every setup issue you hit: command used, error message, fix, and the final working command. This habit sounds small, but it builds interview stories and saves hours when the same issue appears on a colleague’s machine.
Install Playwright With TypeScript
The official installation path is simple. Run the Playwright init command and let it create the base project.
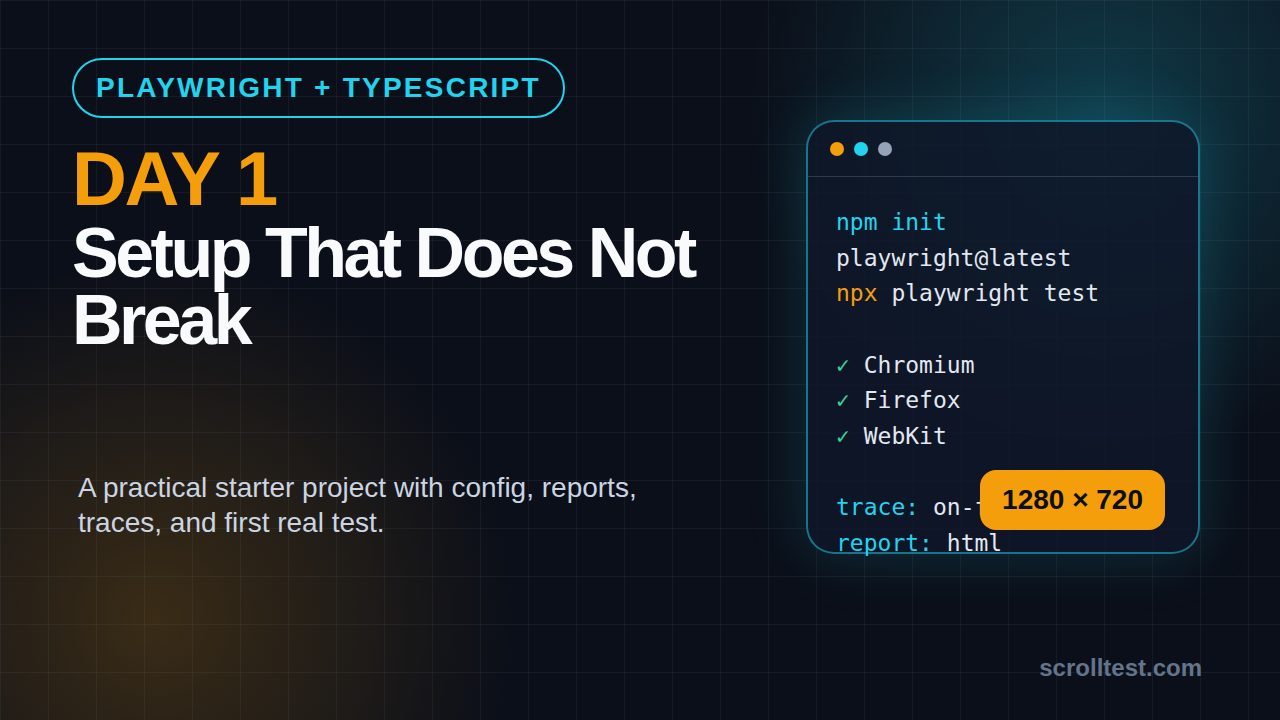
npm init playwright@latest
When the installer asks questions, use these choices for this series:
- Choose TypeScript.
- Use
testsas the test folder. - Add a GitHub Actions workflow only if you want CI from Day 1.
- Install Playwright browsers when prompted.
The installer creates the test runner setup and downloads browser binaries. Playwright supports Chromium, Firefox, and WebKit across Windows, Linux, and macOS. This is one reason I like it for training: a learner on Windows and a learner on macOS can still follow the same testing idea.
Run the example test
Before writing custom code, run the generated example. This confirms that the environment is healthy.
npx playwright test
If it passes, open the report:
npx playwright show-report
Screenshot description: capture the HTML report with one passed test. The important parts are the project name, duration, status, and links to each test. This is the first report you can show to a manager without explaining terminal logs.
Install browsers again if needed
If your test fails because a browser executable is missing, run:
npx playwright install
On Linux CI machines, you may also need system dependencies. The Playwright docs provide a dependency install command, but on your local laptop the normal browser install is usually enough.
Understand the Project Files
A beginner should not treat generated files as magic. Open the folder and understand what each part does.
playwright.config.ts
This is the control room. It defines browsers, base URL, timeouts, retries, reporter settings, trace settings, and shared options.
import { defineConfig, devices } from '@playwright/test';

export default defineConfig({
  testDir: './tests',
  timeout: 30_000,
  expect: {
    timeout: 5_000,
  },
  reporter: [['html', { open: 'never' }]],
  use: {
    baseURL: 'https://scrolltest.com',
    trace: 'on-first-retry',
    screenshot: 'only-on-failure',
    video: 'retain-on-failure',
  },
  projects: [
    { name: 'chromium', use: { ...devices['Desktop Chrome'] } },
    { name: 'firefox', use: { ...devices['Desktop Firefox'] } },
    { name: 'webkit', use: { ...devices['Desktop Safari'] } },
  ],
});
This config is intentionally small. I set baseURL so tests can use relative paths. I keep traces on first retry because recording traces for every passing test can make artifacts heavy. I keep screenshots and videos only for failures because that is what most teams need in daily execution.
tests folder
This is where test files live. For Day 1, keep everything in one file. Later in the series, we will separate pages, fixtures, API clients, and test data.
package.json
This file stores scripts and dependencies. Add scripts that your team can remember.
{
  "scripts": {
    "test": "playwright test",
    "test:headed": "playwright test --headed",
    "test:ui": "playwright test --ui",
    "report": "playwright show-report"
  }
}
Now you can run npm test instead of typing the full command every time.
🚀 Level Up Your Playwright
From locators to CI pipelines — build a production-grade Playwright + TypeScript framework step by step.
Write Your First Real Test
Delete the generated example or keep it as a reference. Create a new file called tests/home.spec.ts.
import { test, expect } from '@playwright/test';

test('home page has a visible title and working search entry point', async ({ page }) => {
  await page.goto('/');

  await expect(page).toHaveTitle(/ScrollTest/i);
  await expect(page.getByRole('link', { name: /ScrollTest/i }).first()).toBeVisible();
});
This is small, but it teaches three important habits:
- Use
page.goto('/')becausebaseURLis already configured. - Use web-first assertions like
toBeVisible()andtoHaveTitle(). - Prefer user-facing locators such as role, label, text, and placeholder.
Why not use CSS selectors first?
CSS selectors are useful, but they are not my first choice for beginner UI tests. If you write .header > div:nth-child(2) > a, the test is tied to layout instead of behaviour. A small UI redesign breaks it even though the user flow still works.
Playwright’s best-practices guide recommends locators that match how users and assistive technologies see the page. That means role, text, label, placeholder, and test id when needed. I want testers to learn this from Day 1 because locator quality is the difference between a useful regression suite and a flaky burden.
Add a second test with a test id pattern
If your application has stable test ids, configure the attribute in playwright.config.ts.
use: {
  testIdAttribute: 'data-testid',
}
Then write:
await page.getByTestId('login-submit').click();
Do not add test ids to every element. Add them to important controls where role or label is not stable enough.
Configure Browsers, Reporters, and Traces
A real Playwright TypeScript setup should tell you what failed, where it failed, and how to reproduce it. That is why config matters.
Run only one browser while developing
During local development, run one project first:
npx playwright test --project=chromium
Then run all browsers before pushing:
npx playwright test
This saves time. You do not need three-browser execution while you are still fixing a selector.
Use traces for failure analysis
Trace Viewer is one of Playwright’s strongest features. It shows actions, DOM snapshots, network calls, console logs, and timing. When a test fails in CI, the trace is often better than a long Slack thread.
npx playwright test --trace on
npx playwright show-trace test-results/path-to-trace.zip
Screenshot description: capture Trace Viewer with the left action list, center DOM snapshot, and bottom network panel. In a team demo, this screenshot explains Playwright’s debugging value faster than a slide.
Keep retries low
Retries can hide bad tests. Use them carefully. My default rule is simple:
- Local development:
retries: 0. - CI smoke suite:
retries: 1if the environment is occasionally noisy. - Stable regression suite: fix flakiness instead of increasing retries.
Later in the series, we will discuss flaky tests properly. For now, do not use retries as a bandage for weak locators or missing assertions.
Debug Like an SDET
Beginners often debug by adding console.log everywhere. That is fine for learning, but Playwright gives you better tools.
Run in headed mode
npx playwright test --headed
This opens the browser so you can watch actions. It is useful when the test clicks the wrong element or navigation happens later than expected.
Use UI mode
npx playwright test --ui
UI mode lets you run, filter, inspect, and debug tests visually. For learners, it reduces fear. You see the test steps and browser state instead of staring at terminal output.
Use the inspector
PWDEBUG=1 npx playwright test
On Windows PowerShell, use:
$env:PWDEBUG=1
npx playwright test
The inspector lets you step through the test. It also helps you test locator ideas before committing code.
Common Pitfalls in Day 1 Setup
I see the same mistakes in beginner Playwright projects. Fix these early and you avoid weeks of unstable automation.
Pitfall 1: Installing globally
Do not depend on a global Playwright install. Keep Playwright inside the project dependency list. Your CI, your teammate’s laptop, and your local project should use the same package version.
Pitfall 2: Hard-coding full URLs everywhere
This is noisy:
await page.goto('https://staging.example.com/login');
This is cleaner:
await page.goto('/login');
Use baseURL. Later, you can change environments without editing every test.
Pitfall 3: Using fixed waits
This is a bad habit:
await page.waitForTimeout(5000);
Prefer waiting for behaviour:
await expect(page.getByRole('heading', { name: /dashboard/i })).toBeVisible();
Fixed waits slow down passing tests and still fail when the app takes longer than expected. Web-first assertions are cleaner because they wait for a condition.
Pitfall 4: Creating a framework too early
Do not create ten folders on Day 1 because a YouTube framework video did it. First write five stable tests. Then extract patterns. A framework should grow from repeated pain, not from decoration.
Pitfall 5: Ignoring reports
A test suite without readable reports is not useful to a team. From Day 1, make sure the HTML report opens and failed tests create screenshots or traces. Your manager does not want to decode terminal noise.
Key Takeaways
A clean Playwright TypeScript setup gives you a foundation for the remaining 20 days of this series. Keep it simple, run it often, and understand each file before adding abstractions.
- Install with
npm init playwright@latestand choose TypeScript. - Use
playwright.config.tsas the single source for browser, trace, screenshot, and base URL settings. - Write your first test with role-based locators and web-first assertions.
- Use HTML reports and Trace Viewer from the start.
- Avoid fixed waits, global installs, and premature framework folders.
Day 2 will focus on locators and assertions because that is where most Playwright beginners either become strong automation engineers or create flaky scripts.
FAQ
Is Playwright better than Selenium for beginners?
For a TypeScript learner, Playwright is easier to start because the test runner, assertions, browser management, traces, and reports are built into one toolchain. Selenium is still valuable, especially in Java-heavy enterprise teams, but Playwright gives beginners faster feedback.
Do I need advanced TypeScript before learning Playwright?
No. You need variables, functions, imports, async and await, and basic object syntax. Learn TypeScript while writing tests. Do not spend two months studying TypeScript theory before opening a browser.
Should I run tests on all three browsers every time?
No. Run Chromium while developing. Run Chromium, Firefox, and WebKit before pushing important changes or in CI. This keeps feedback fast without ignoring cross-browser coverage.
Can manual testers follow this series?
Yes. The series is designed for manual testers moving into automation. If you can use a terminal, read a web page, and understand test cases, you can learn the coding part step by step.
What should I build after Day 1?
Build three small tests for a real website you understand: home page, login page, and search or navigation. Keep them simple. The goal is not volume. The goal is a stable Playwright TypeScript setup you can trust.
Sources: Playwright official installation documentation, Playwright TypeScript documentation, Playwright best-practices documentation, Microsoft Playwright GitHub repository data, and npm package data for @playwright/test.
🎓 Master Playwright End to End
Join hundreds of SDETs building real automation frameworks. Lifetime access, hands-on projects, and a job-ready portfolio.