Playwright TypeScript Checklist: Day 22 Bonus
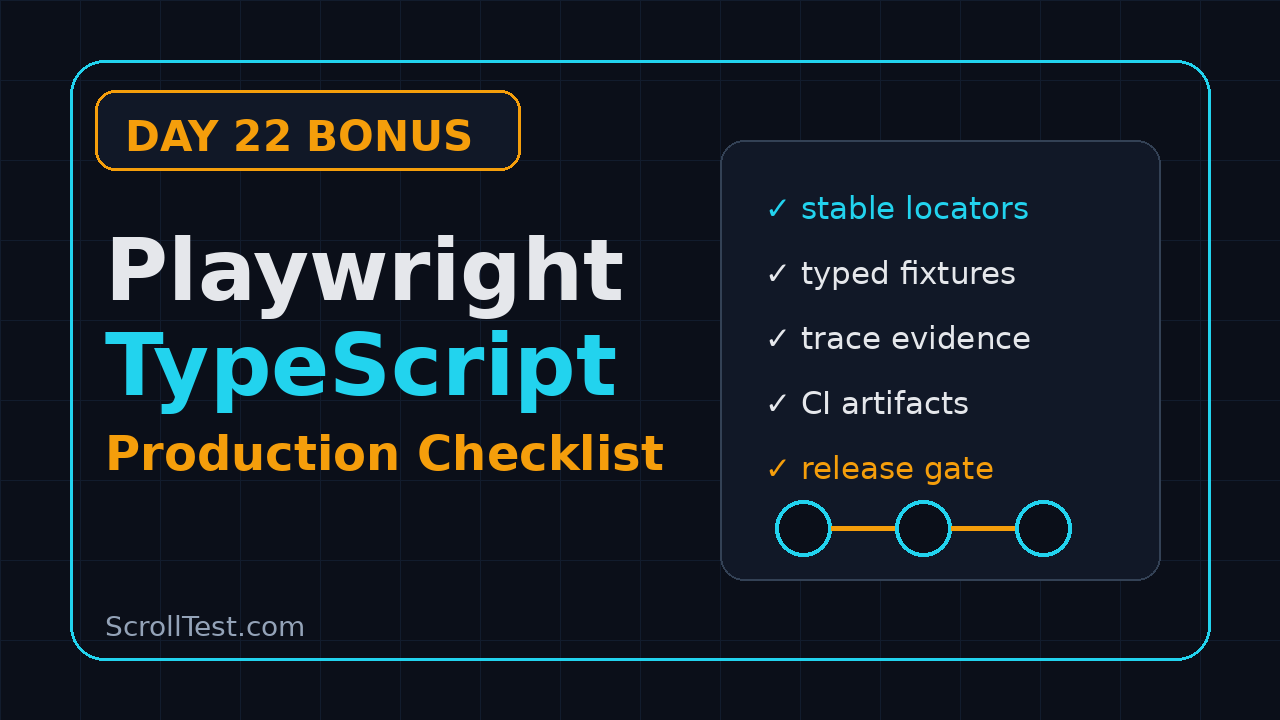
Day 22 bonus: This Playwright TypeScript checklist is the final production-readiness pass I want every SDET to run before calling a framework complete. The earlier 21 days gave you locators, fixtures, API tests, reports, CI, Docker, visual checks, data strategy, and framework architecture. This article turns those parts into a release checklist you can use before your suite becomes the quality gate for a real product.
I am keeping this practical. You will get a checklist, TypeScript examples, screenshot descriptions, and the mistakes I see when teams move from “tests run on my laptop” to “tests block a release.”
Table of Contents
- Why a Playwright TypeScript checklist matters
- Baseline setup: versions, config, and scripts
- Selector and assertion checklist
- Fixture, data, and authentication checklist
- Debugging, traces, and screenshot evidence
- CI checklist for reliable release gates
- Code review checklist for SDETs
- Common pitfalls I still see
- Key takeaways
- FAQ
Contents
Why a Playwright TypeScript checklist matters
Playwright has become a serious choice for modern web automation. The public GitHub repository shows more than 92,000 stars, and the npm API reported more than 181 million downloads for @playwright/test in the last month when I checked it for this article. Those numbers do not make your framework good by default, but they tell us one thing clearly: many teams are now betting their UI and API checks on this tool.
That shift creates a new problem. A beginner can create a test with npx playwright codegen in five minutes, but a release-ready framework needs rules. It needs stable selectors, clean fixtures, useful traces, deterministic test data, readable reports, and a CI setup that fails for the right reason.
I see three types of Playwright suites in companies:
- Demo suites that prove Playwright can click buttons.
- Team suites that run for one squad but depend on tribal knowledge.
- Release suites that a manager trusts before deployment.
This Playwright TypeScript checklist is designed to move you from the second bucket to the third. If you are working in a service company like TCS, Infosys, Wipro, or Cognizant, this checklist helps you speak in terms of maintainability and risk. If you are in a product company, it helps you reduce regression time without creating a flaky gate that developers start ignoring.
For official behavior, always cross-check the Playwright documentation. For release changes, track the Playwright GitHub releases. I am adding those links because production automation should not depend only on blog posts, including mine.
Baseline setup: versions, config, and scripts
Your checklist starts before the first test file. A messy setup creates slow failures later. I want the project to be boring, explicit, and easy for a new SDET to run on day one.
1. Pin Playwright and browser versions
Do not let every engineer run a different version. Playwright ships browser binaries with the framework, so version drift can change behavior. Check the installed version in CI and local machines.
npm ls @playwright/test
npx playwright --version
npx playwright install --with-deps
In package.json, keep scripts small and named by intent:
{
  "scripts": {
    "test:e2e": "playwright test",
    "test:e2e:headed": "playwright test --headed",
    "test:e2e:debug": "PWDEBUG=1 playwright test",
    "test:e2e:report": "playwright show-report",
    "test:e2e:smoke": "playwright test --grep @smoke"
  },
  "devDependencies": {
    "@playwright/test": "^1.61.1",
    "typescript": "^5.5.0"
  }
}
The exact versions will change. The rule stays the same: document the version, update deliberately, and run a smoke pack after every upgrade. Playwright’s latest release at the time of this cron run was v1.61.1 on GitHub, so I would create an upgrade branch before moving a team framework to it.
2. Keep playwright.config.ts readable
A config file should tell the next engineer how the framework behaves. If your config has 200 lines of hidden conditionals, your suite will become hard to debug.
import { defineConfig, devices } from '@playwright/test';

export default defineConfig({
  testDir: './tests',
  timeout: 45_000,
  expect: { timeout: 10_000 },
  fullyParallel: true,
  forbidOnly: !!process.env.CI,
  retries: process.env.CI ? 2 : 0,
  workers: process.env.CI ? 4 : undefined,
  reporter: [
    ['html', { open: 'never' }],
    ['junit', { outputFile: 'test-results/junit.xml' }]
  ],
  use: {
    baseURL: process.env.BASE_URL ?? 'https://example.com',
    trace: 'on-first-retry',
    screenshot: 'only-on-failure',
    video: 'retain-on-failure'
  },
  projects: [
    { name: 'chromium', use: { ...devices['Desktop Chrome'] } },
    { name: 'firefox', use: { ...devices['Desktop Firefox'] } }
  ]
});
This config follows the official ideas documented in Playwright test configuration. The key is not copying my values blindly. The key is knowing why each value exists.
3. Add a local readiness command
Before CI, create one command that checks TypeScript, linting, and a small smoke suite. This prevents weak commits from reaching the pipeline.
npm run typecheck
npm run lint
npm run test:e2e:smoke
Screenshot description: capture your terminal after this command passes. The screenshot should show the Playwright summary line, browser project name, duration, and zero failed tests. Add it to your team wiki as the expected local baseline.
Selector and assertion checklist
Bad selectors are the fastest way to make a good tool look unreliable. Playwright gives you better locator APIs than older frameworks, but it does not stop you from writing brittle selectors.
Prefer user-facing locators first
The official locator guide recommends role, label, text, placeholder, alt text, title, and test id locators depending on the situation. My default order is simple:
- Use
getByRolewhen the element has a clear accessible role and name. - Use
getByLabelfor form inputs. - Use
getByTestIdfor dynamic components where business text changes often. - Use CSS only when you are testing layout or there is no better stable contract.
import { test, expect } from '@playwright/test';

test('user can create a project', async ({ page }) => {
  await page.goto('/projects');

  await page.getByRole('button', { name: 'New Project' }).click();
  await page.getByLabel('Project name').fill('Checkout Regression Pack');
  await page.getByRole('button', { name: 'Create' }).click();

  await expect(page.getByRole('heading', { name: 'Checkout Regression Pack' })).toBeVisible();
});
Notice the test reads like a user journey. This is easier to review than div:nth-child(3) > button. It also pushes developers to keep accessible names meaningful, which is a good side effect.
Assertions should wait for business outcomes
Do not assert random implementation details. Assert the result the user or system cares about. Playwright’s web-first assertions automatically retry until the timeout, so use them instead of manual sleep calls.
await expect(page.getByText('Payment successful')).toBeVisible();
await expect(page.getByRole('button', { name: 'Download invoice' })).toBeEnabled();
await expect(page).toHaveURL(/\/orders\/\d+$/);
Checklist for selectors and assertions:
- No
waitForTimeoutin committed tests unless there is a documented reason. - No long CSS chains for product flows.
- Every critical action has a visible or API-level assertion after it.
- Test IDs follow a naming convention, for example
data-testid="checkout-submit". - Assertions check business state, not random DOM noise.
If you want a focused guide for dynamic inputs, read the ScrollTest tutorial on testing autocomplete and typeahead inputs in Playwright. For select controls, the multi-select dropdown guide gives a useful companion example.
Fixture, data, and authentication checklist
Fixtures decide whether your framework scales. Without fixtures, every test repeats setup code. With bad fixtures, every test hides too much and becomes hard to understand.
Create fixtures for behavior, not convenience
A fixture should represent a reusable testing capability: authenticated user, seeded project, API client, temporary inbox, or test data factory. It should not become a dumping ground for every helper function.
import { test as base, expect, APIRequestContext } from '@playwright/test';

type Project = { id: string; name: string };

type TestFixtures = {
  project: Project;
  api: APIRequestContext;
};

export const test = base.extend<TestFixtures>({
  api: async ({ request }, use) => {
    await use(request);
  },

  project: async ({ request }, use) => {
    const name = `e2e-project-${Date.now()}`;
    const response = await request.post('/api/projects', { data: { name } });
    expect(response.ok()).toBeTruthy();

    const project = await response.json();
    await use(project);

    await request.delete(`/api/projects/${project.id}`);
  }
});

export { expect };
This pattern uses Playwright’s fixture model, described in the official fixture documentation. The setup and cleanup are in one place, and the test receives a ready-to-use object.
Keep authentication out of every test
If every test logs in through the UI, your suite is slower and more fragile. Use a saved storage state for normal authenticated flows. Keep one or two UI login tests to validate the login screen itself.
// auth.setup.ts
import { test as setup, expect } from '@playwright/test';

setup('authenticate as standard user', async ({ page }) => {
  await page.goto('/login');
  await page.getByLabel('Email').fill(process.env.E2E_EMAIL!);
  await page.getByLabel('Password').fill(process.env.E2E_PASSWORD!);
  await page.getByRole('button', { name: 'Sign in' }).click();
  await expect(page.getByRole('navigation')).toBeVisible();
  await page.context().storageState({ path: 'playwright/.auth/user.json' });
});
Then attach the state in a project:
projects: [
  { name: 'setup', testMatch: /.*\.setup\.ts/ },
  {
    name: 'chromium-authenticated',
    use: { ...devices['Desktop Chrome'], storageState: 'playwright/.auth/user.json' },
    dependencies: ['setup']
  }
]
Do not commit real auth files. Add them to .gitignore. The official Playwright authentication guide covers the storage state pattern in detail.
Test data needs ownership
In Indian QA teams, I often see one shared QA environment with one shared user and one shared test record. That works for demos. It fails badly when five engineers, one nightly job, and one release candidate touch the same data.
Use this data checklist:
- Every created record has a unique prefix, for example
e2e-. - Every test owns its data or uses read-only reference data.
- Cleanup is automatic, but the test still passes if cleanup fails after the assertion.
- Secrets come from CI variables, not from committed files.
- Data factories stay typed, so a refactor fails during TypeScript checks.
For a broader strategy, I would pair this article with ScrollTest’s test data management guide for SDETs.
Debugging, traces, and screenshot evidence
A release-ready suite must fail loudly and usefully. A bad failure says “Timeout 30000ms exceeded.” A good failure says which user journey broke, what the page looked like, what network call failed, and what changed between the first attempt and the retry.
Turn on traces where they help
Playwright trace viewer is one of the biggest reasons I prefer it for team frameworks. The official trace viewer documentation explains how traces capture actions, snapshots, console logs, and network details. In CI, I usually set traces to on-first-retry. This keeps normal runs light while preserving evidence for flaky failures.
use: {
  trace: 'on-first-retry',
  screenshot: 'only-on-failure',
  video: 'retain-on-failure'
}
Screenshot description: open a failed trace in Trace Viewer and capture the action timeline. The screenshot should show the failing click, the DOM snapshot on the right, and the network tab with the failed API request highlighted. This is the kind of evidence developers actually use.
Add failure notes with test.step
Long tests are hard to debug when every action appears as a flat list. Use test.step to label meaningful stages.
test('checkout flow creates a paid order', async ({ page }) => {
  await test.step('add product to cart', async () => {
    await page.goto('/products/sku-123');
    await page.getByRole('button', { name: 'Add to cart' }).click();
    await expect(page.getByText('Added to cart')).toBeVisible();
  });

  await test.step('pay with test card', async () => {
    await page.getByRole('link', { name: 'Checkout' }).click();
    await page.getByLabel('Card number').fill('4242424242424242');
    await page.getByRole('button', { name: 'Pay now' }).click();
  });

  await test.step('verify order confirmation', async () => {
    await expect(page.getByText('Payment successful')).toBeVisible();
  });
});
This small habit improves reports, traces, and code review. It also makes your tests easier to explain during incident calls.
Use a triage label system
When a CI job fails, classify the failure before fixing it. I use five buckets:
- Product bug: application behavior changed or broke.
- Test bug: the test made a wrong assumption.
- Environment issue: deployment, data, or dependency failed.
- Framework issue: fixture, config, auth, or helper failed.
- Unknown: needs trace review before assignment.
This is where SDETs add real value. Do not just paste a failed screenshot in Slack. Add the bucket, suspected cause, trace link, affected build, and whether the failure blocks release.
CI checklist for reliable release gates
CI is where Playwright frameworks become real. A test that only runs from one engineer’s laptop is not a release signal. The CI version must be repeatable, fast enough, and strict about reporting.
Use a clear GitHub Actions workflow
Here is a minimal workflow I would accept for a small team. Larger teams can add sharding, Docker images, and environment promotion later.
name: Playwright E2E

on:
  pull_request:
  workflow_dispatch:

jobs:
  e2e:
    runs-on: ubuntu-latest
    timeout-minutes: 30
    steps:
      - uses: actions/checkout@v4
      - uses: actions/setup-node@v4
        with:
          node-version: 22
          cache: npm
      - run: npm ci
      - run: npx playwright install --with-deps
      - run: npm run test:e2e
        env:
          BASE_URL: ${{ secrets.E2E_BASE_URL }}
          E2E_EMAIL: ${{ secrets.E2E_EMAIL }}
          E2E_PASSWORD: ${{ secrets.E2E_PASSWORD }}
      - uses: actions/upload-artifact@v4
        if: always()
        with:
          name: playwright-report
          path: |
            playwright-report
            test-results
          retention-days: 7
The important parts are npm ci, browser installation, secrets from CI, and artifact upload on every run. Without artifacts, failed UI tests become guesswork.
Set pass criteria before adding more tests
Teams often ask for 500 automated tests. I would rather have 50 reliable tests that block a release correctly. Define these rules:
- Smoke pack must finish in under 10 minutes.
- Critical pack must upload trace, screenshot, and HTML report.
- Retries are allowed in CI, but every retry failure is reviewed weekly.
- Tests tagged
@wipcannot run in release gates. - Flaky tests are quarantined with an owner and removal date.
For advanced CI patterns, read the earlier ScrollTest article on building an AI-augmented Playwright test suite. It pairs well with this checklist when you start adding generated scenarios or AI-assisted failure summaries.
Sharding is not a replacement for cleanup
Sharding helps speed, but it also exposes weak data design. If tests collide when they run in parallel, do not blame CI. Fix the data ownership first, then split the workload.
npx playwright test --shard=1/4
npx playwright test --shard=2/4
npx playwright test --shard=3/4
npx playwright test --shard=4/4
The Playwright CI guide at playwright.dev/docs/ci is the source I keep open when I review pipeline setup. It is short, direct, and updated with framework changes.
Code review checklist for SDETs
Code review is where automation quality becomes team culture. If reviewers only check whether a test passes locally, the framework will decay.
Review the user journey first
Ask one question before reading helper details: does this test protect a real risk? If the answer is no, the test should not enter the suite.
Use this review checklist:
- Does the test name describe business behavior?
- Does the setup create or reference clear test data?
- Are locators user-facing or intentionally test-id based?
- Are assertions tied to user-visible or API-visible outcomes?
- Will this test run in parallel without colliding with another test?
- Does the failure produce useful evidence?
- Is the test tagged correctly for smoke, regression, or release?
Two patterns deserve a hard no in review:
// Bad: hides a timing problem
await page.waitForTimeout(5000);

// Bad: hides a failed action
try {
  await page.getByRole('button', { name: 'Submit' }).click();
} catch (error) {
  console.log('Ignoring click failure');
}
Replace them with state-based waits and real assertions:
await expect(page.getByRole('button', { name: 'Submit' })).toBeEnabled();
await page.getByRole('button', { name: 'Submit' }).click();
await expect(page.getByText('Request submitted')).toBeVisible();
Make ownership visible
Every flaky or skipped test needs an owner. In a 15-person QA team, “someone will fix it” usually means nobody fixes it. Add annotations when needed, but do not use them as a dumping ground.
test('@smoke checkout saves billing address', async ({ page }) => {
  test.info().annotations.push({
    type: 'owner',
    description: 'payments-qa'
  });

  // test body
});
The goal is not bureaucracy. The goal is fast ownership when the release gate breaks at 7 PM.
Common pitfalls I still see
Even good teams repeat the same mistakes. Use this section as a final scan before you call your framework production-ready.
Pitfall 1: treating retries as a fix
Retries are a diagnostic tool. They are not a quality strategy. If a test passes on retry every day, the suite is telling you something. It may be an async issue, unstable data, slow environment, or a real intermittent product bug. Review retry reports weekly.
Pitfall 2: mixing API setup with UI assertions badly
API setup is excellent when used carefully. Create data through APIs, then verify user behavior in the UI. Do not verify UI behavior only through API responses and still call it an end-to-end test.
Pitfall 3: overusing page objects
Page Object Model is useful, but it can become a second application with its own bugs. Keep page objects thin. Store locators and simple actions there. Keep test intent visible in the spec file.
Pitfall 4: ignoring accessibility locators
If getByRole does not work anywhere in your app, that may reveal an accessibility problem. Do not immediately switch to CSS for everything. Talk to developers and improve the UI contract.
Pitfall 5: not training manual testers on trace reading
Manual testers moving into automation often think coding is the whole skill. It is not. Trace reading, failure triage, and risk-based test selection are equally valuable. In many Bengaluru product companies, that is the difference between “automation executor” and SDET ownership.
Key takeaways
This Playwright TypeScript checklist is not a certificate that says your framework is perfect. It is a practical release-readiness scan. Run it before you add another hundred tests.
- Keep versions, scripts, and config explicit.
- Use user-facing locators and business-level assertions.
- Move repeated setup into typed fixtures, not copy-pasted helpers.
- Use storage state for authentication and keep secrets out of Git.
- Capture traces, screenshots, videos, and reports for CI failures.
- Review flaky tests as engineering work, not QA noise.
- Make ownership visible through tags, annotations, and triage notes.
If you completed the first 21 days, this bonus day is your final audit. Pick one existing test suite, run the checklist, and fix the top three gaps before writing new tests. That is how a Playwright TypeScript checklist becomes a real engineering habit.
FAQ
Is this Playwright TypeScript checklist only for large teams?
No. Small teams need it even more because they have less time to debug weak automation. Start with selectors, config, traces, and CI artifacts. Add the deeper fixture and data rules as your suite grows.
Should every Playwright test use Page Object Model?
No. Use page objects when they reduce duplication without hiding the journey. For short flows, a clear spec file can be better than a page object full of one-line wrappers.