AI Browser Agent Evidence Checklist for QA Teams
I see the same mistake in AI browser testing again and again: teams celebrate a green agent run but cannot explain what the agent actually saw, clicked, extracted, or changed. An AI browser agent evidence checklist fixes that. It turns every BrowsingBee run into a reviewable QA artifact with the original instruction, DOM state, screenshot, trace, and defect summary.
Table of Contents
- Why Evidence Matters for AI Browser Agents
- The BrowsingBee AI Browser Agent Evidence Checklist
- 1. Capture the Original Instruction
- 2. Record the DOM State That Mattered
- 3. Attach Screenshots That Prove the UI State
- 4. Save a Trace for Replay and Debugging
- 5. Write a Defect Summary Humans Can Triage
- How to Implement the Checklist in a QA Workflow
- AI Browser Agent Evidence Checklist Quality Rubric
- India QA Team Context
- Key Takeaways
- FAQ
Contents
Why Evidence Matters for AI Browser Agents
Green is not enough
A browser agent that returns {"status":"success"} is useful only if the team trusts the path it took. Did it click the intended button? Did it read the right table row? Did it skip a modal because the selector was ambiguous? Without evidence, the result is a story, not a test artifact.
BrowsingBee turns web workflows into AI-runnable skills. Its homepage describes the core idea clearly: define a workflow once, then run it through the BrowsingBee CLI with structured output. That is powerful for sign-in flows, form submissions, data extraction, change monitoring, and AI agent tasks. But power without evidence creates a new QA problem: the agent can move faster than the reviewer can inspect.
The debugging gap is real
Classic Playwright tests already have a mature evidence pattern. Playwright has official documentation for Trace Viewer, screenshots, locators, and reporters. Teams use these artifacts because a failing test without trace, screenshot, console log, or network context wastes hours.
The same rule applies to AI browser agents. The only difference is that the agent may choose steps dynamically or work from a higher-level instruction. That makes evidence more important, not less important.
The scale signal is already here
Playwright is not a small niche tool anymore. The GitHub API reported 92,059 stars for microsoft/playwright during my research for this article, and the npm downloads API reported 163,181,703 downloads for @playwright/test in the last-month window from 2026-05-30 to 2026-06-28. Those numbers matter because teams are already trained to ask for browser automation evidence. BrowsingBee should fit that habit instead of asking QA teams to trust a black box.
If you already read ScrollTest articles like Playwright 1.61.1 Upgrade Checklist for Flaky UI Suites or Playwright Soft Assertions Deep Dive, the pattern is familiar: keep the test output specific, reproducible, and easy to triage.
The BrowsingBee AI Browser Agent Evidence Checklist
The 5 artifacts I want for every serious run
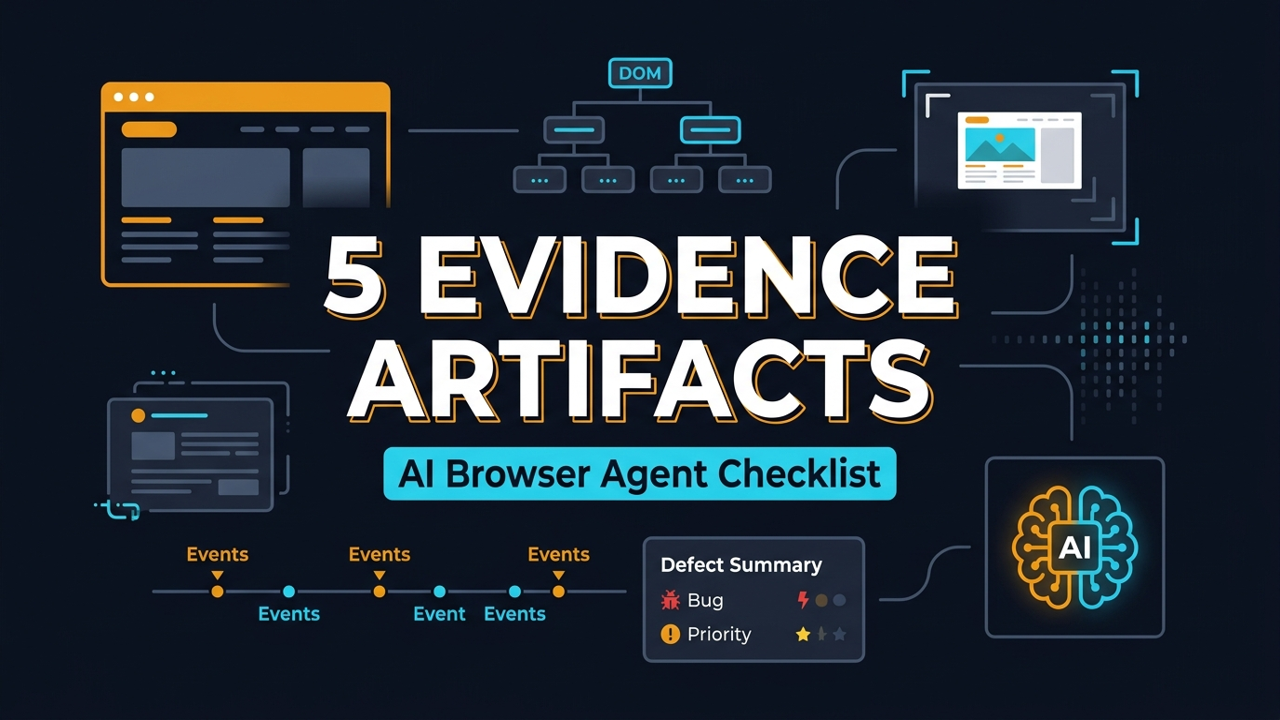
For BrowsingBee-facing agent runs, I use a simple checklist. Every run should produce these 5 artifacts:
- Instruction: the exact user or system instruction sent to the agent.
- DOM state: the relevant elements, labels, roles, selected values, and extracted text.
- Screenshot: the visible UI state before or after the important action.
- Trace: a replayable action timeline with snapshots where Playwright or the runner supports it.
- Defect summary: a human-readable result with expected behavior, actual behavior, severity, and next action.
This is not bureaucracy. It is how you stop AI agent runs from becoming Slack screenshots and vague comments like “agent failed on staging”.
What the checklist is not
The checklist is not a demand to store every byte from every session forever. Teams should still respect privacy, compliance, and cost. A login skill that handles sensitive user data should redact tokens, passwords, cookies, and personal data. A production monitoring skill may keep only a screenshot hash, a DOM snippet, and a defect summary.
The aim is not maximum logging. The aim is reviewable evidence.
Where BrowsingBee fits
BrowsingBee already talks in workflow terms: create a skill, define steps, run through the CLI, receive structured JSON. That structure makes the evidence checklist natural. The run can attach evidence to each step or at least to the critical checkpoints: after navigation, after form submission, after extraction, and when an assertion fails.
This also pairs well with the ideas in QA Agent Skill Library: Reusable Skills Beat Prompts. A reusable agent skill needs reusable evidence. Otherwise every skill becomes a one-off demo that nobody wants to maintain.
1. Capture the Original Instruction
Store the prompt, not a paraphrase
The first artifact is boring, but it saves the most arguments. Store the exact instruction that triggered the run. If the user asked, “Check whether the checkout discount code still works for PRO25,” the evidence should not say, “tested checkout.” It should preserve the instruction and the run context.
For AI browser agents, a small wording change can change the path. “Verify checkout” is not the same as “apply coupon and confirm total.” QA teams need the exact text when they reproduce a run or compare 2 agent versions.
Include version and environment
Instruction capture should include at least these fields:
runId: a unique ID for the run.skillName: for example,checkout-discount-check.instruction: the exact task text.environment: staging, production, preview URL, or local.agentVersion: model, prompt template version, or skill version.startedAt: ISO timestamp.
That is enough for a reviewer to know what was attempted, where it ran, and which version produced the result.
Example evidence header
type AgentRunHeader = {
  runId: string;
  skillName: string;
  instruction: string;
  environment: 'local' | 'staging' | 'production' | string;
  agentVersion: string;
  startedAt: string;
};

const header: AgentRunHeader = {
  runId: 'bb-run-2026-07-02-001',
  skillName: 'checkout-discount-check',
  instruction: 'Apply PRO25 and verify the checkout total changes.',
  environment: 'staging',
  agentVersion: 'skill-v3-agent-v2',
  startedAt: new Date().toISOString(),
};
This is also where I attach a link to the BrowsingBee skill page or internal run page. Do not make the triage engineer search 5 dashboards to find the source run.
2. Record the DOM State That Mattered
DOM evidence beats vague visual claims
Screenshots are helpful, but they are not enough. A screenshot can show that a button exists. DOM evidence can show the accessible name, role, disabled state, selected value, hidden validation message, or extracted text.
Playwright’s locator documentation states that locators are central to auto-waiting and retry-ability. That is the exact mental model QA teams should bring to browser agents. If the agent clicked a button, record which element it resolved to. If it extracted a price, record the selector strategy or accessible locator that produced the value.
Capture only the relevant slice
Do not dump the full DOM for every run. Full DOM dumps are noisy, large, and risky. Capture the slice that supports the decision:
- Form labels and values used by the agent.
- Buttons or links clicked by the agent.
- Visible error messages after submission.
- Table row or card content that was extracted.
- ARIA roles and accessible names for critical controls.
The goal is to answer one question: what did the agent actually act on?
TypeScript example: DOM evidence snapshot
import { test, expect, Page } from '@playwright/test';

async function collectCheckoutEvidence(page: Page) {
  const couponInput = page.getByLabel('Coupon code');
  const applyButton = page.getByRole('button', { name: 'Apply coupon' });
  const total = page.getByTestId('checkout-total');

  return {
    couponInput: {
      visible: await couponInput.isVisible(),
      value: await couponInput.inputValue(),
    },
    applyButton: {
      visible: await applyButton.isVisible(),
      enabled: await applyButton.isEnabled(),
    },
    totalText: await total.textContent(),
  };
}

test('agent evidence includes the checkout DOM slice', async ({ page }) => {
  await page.goto('https://app.example.com/checkout');
  await page.getByLabel('Coupon code').fill('PRO25');
  await page.getByRole('button', { name: 'Apply coupon' }).click();

  const evidence = await collectCheckoutEvidence(page);
  expect(evidence.applyButton.enabled).toBeTruthy();
  expect(evidence.totalText).toContain('₹');
});
This type of evidence is more useful than “checkout page looked fine.” It gives the reviewer a compact object to compare across runs.
3. Attach Screenshots That Prove the UI State
Screenshots still matter
Playwright’s official screenshot docs show the simplest version: await page.screenshot({ path: 'screenshot.png' }). That one line often saves 10 minutes of back-and-forth. For agent runs, screenshots prove visual state: modal open, toast visible, chart loaded, error banner present, or empty state shown.
For BrowsingBee, I recommend at least 2 screenshot checkpoints for important skills:
- After the page reaches the target state.
- After the agent performs the critical action or extraction.
Keep the screenshot readable
A screenshot is evidence only if a human can read it. Capture the viewport where the issue happens. Mask sensitive values. Give the file a deterministic name. Add it to the run summary so a reviewer does not open 20 unnamed files.
await page.screenshot({
  path: `evidence/${runId}/checkout-after-coupon.png`,
  fullPage: false,
  mask: [page.getByLabel('Email'), page.getByLabel('Card number')],
});
The mask option is important for teams that run against staging systems with realistic data. Evidence should increase trust without leaking private information.
Screenshot plus DOM is stronger than either alone
A screenshot can show a total of ₹7,499. DOM evidence can show the text that the agent extracted from data-testid="checkout-total". Put both in the same run. When they disagree, you have a real investigation path: rendering delay, hidden duplicate node, stale locator, or agent extraction error.
This is similar to how I think about prompt regression testing for QA. You do not trust a single output. You keep a compact set of artifacts that show what changed.
4. Save a Trace for Replay and Debugging
Trace is the artifact that ends guesswork
Playwright Trace Viewer lets you explore recorded traces after a test run. The official docs describe it as a GUI tool for recorded Playwright traces. In practice, a trace gives the reviewer the action timeline, DOM snapshots, network context, console output, and screenshots depending on configuration.
For AI browser agents, trace is the artifact I want when the result is surprising. If the agent says “the payment button is missing,” I want to replay the exact path. Did it land on the wrong region? Did an AB test hide the button? Did a cookie banner cover it? A trace answers that faster than a meeting.
Use trace on retry or failure if cost matters
Not every run needs full tracing. Trace files can be large. A sane policy is:
- Always trace high-risk skills such as checkout, signup, billing, or admin flows.
- Trace on first run after a skill change.
- Trace on failure or retry for routine monitoring skills.
- Keep trace retention short for production runs unless compliance requires more.
Playwright trace setup example
import { defineConfig } from '@playwright/test';

export default defineConfig({
  use: {
    trace: 'on-first-retry',
    screenshot: 'only-on-failure',
    video: 'retain-on-failure',
  },
  reporter: [['html'], ['json', { outputFile: 'evidence/results.json' }]],
});
This config is a good default for many teams. It avoids storing heavy evidence for every passing run while keeping enough detail when something breaks.
Connect trace back to the agent decision
The trace should not live as an orphan file. The defect summary should link to it. The run JSON should include the trace path. The CI job should upload it as an artifact. If a QA lead has to search a build folder manually, the evidence system is only half-built.
5. Write a Defect Summary Humans Can Triage
The agent result must read like a good QA bug
The final artifact is the defect summary. This is where many AI agent demos fail. They return a blob of text with confidence scores and no triage value. A QA defect needs structure.
I use this format:
- Expected: what should have happened.
- Actual: what the agent observed.
- Evidence: screenshot, DOM slice, trace, logs.
- Severity: blocker, high, medium, low.
- Repro steps: short numbered steps.
- Suggested owner: frontend, backend, data, test, product.
Example defect summary JSON
{
  "status": "failed",
  "summary": "Coupon PRO25 did not change the checkout total on staging.",
  "expected": "Applying PRO25 should reduce the order total by 25%.",
  "actual": "The total stayed at ₹9,999 after clicking Apply coupon.",
  "severity": "high",
  "evidence": {
    "screenshot": "evidence/bb-run-2026-07-02-001/checkout-after-coupon.png",
    "dom": "evidence/bb-run-2026-07-02-001/dom.json",
    "trace": "evidence/bb-run-2026-07-02-001/trace.zip"
  },
  "reproSteps": [
    "Open staging checkout page",
    "Enter coupon PRO25",
    "Click Apply coupon",
    "Check checkout total"
  ],
  "suggestedOwner": "frontend"
}
This is readable by a human and usable by a tool. That is the sweet spot.
Do not overstate the conclusion
An agent should not claim root cause unless the evidence proves it. “Coupon API is broken” is too strong if the run only observed a UI total that did not change. Better: “The checkout UI did not reflect a discount after applying PRO25; inspect coupon API response and frontend state update.” That wording is honest and useful.
How to Implement the Checklist in a QA Workflow
Start with 3 skills, not 30
Pick 3 BrowsingBee skills that matter to the business:
- Sign in and confirm the dashboard loads.
- Create or update a record through a form.
- Extract a critical value from a table, card, or report.
Add the evidence checklist to those first. Do not start by instrumenting every tiny helper skill. Prove the pattern on flows that product managers and QA leads already care about.
Use a single evidence folder structure
A consistent folder structure keeps artifacts easy to upload from CI and easy to inspect later.
evidence/
  bb-run-2026-07-02-001/
    header.json
    dom.json
    screenshots/
      after-navigation.png
      after-critical-action.png
    trace.zip
    defect-summary.json
If the run passes, defect-summary.json can still exist with status: "passed" and the extracted data. Passed runs need evidence too, especially when they feed another AI agent or a deployment decision.
Wire it into CI
In CI, every agent run should publish evidence as an artifact. GitHub Actions, GitLab CI, Jenkins, and Azure DevOps all support artifact upload. The implementation detail changes, but the rule stays the same: if the run influenced a decision, keep the evidence.
name: browsingbee-agent-check

on:
  workflow_dispatch:
  schedule:
    - cron: '30 3 * * *'

jobs:
  run-agent-skill:
    runs-on: ubuntu-latest
    steps:
      - uses: actions/checkout@v4
      - name: Run BrowsingBee skill
        run: |
          browsingbee run checkout-discount-check \
            --output evidence/run.json
      - name: Upload evidence
        uses: actions/upload-artifact@v4
        with:
          name: browsingbee-agent-evidence
          path: evidence/
That example uses the BrowsingBee CLI concept shown on the BrowsingBee homepage. Adjust the command flags to match your project setup.
Add a review gate
For high-risk flows, do not let the agent result directly approve a release. Add a review gate:
- Auto-pass low-risk monitoring checks when evidence is complete.
- Require QA review for checkout, billing, security, and admin workflows.
- Fail the run if required evidence is missing.
- Track repeated missing evidence as a framework bug.
This is where QA engineers stay important. AI runs the workflow. QA designs the evidence standard.
AI Browser Agent Evidence Checklist Quality Rubric
Score each run before you trust it
I like a simple 10-point rubric because it makes evidence quality visible. A run gets 2 points for exact instruction capture, 2 points for a useful DOM slice, 2 points for readable screenshots, 2 points for trace or replay data, and 2 points for a clear defect summary. Anything below 8 should not approve a release by itself.
This sounds strict until you debug your first bad agent run at 11:30 PM. Missing instruction means you cannot reproduce intent. Missing DOM means you cannot prove what the agent clicked. Missing screenshot means nobody knows the visible state. Missing trace means replay becomes guesswork. Missing summary means the defect lands in Jira as noise.
Make missing evidence a framework failure
Do not treat missing evidence as a tester mistake every time. If the BrowsingBee skill passes but the evidence folder is incomplete, mark the automation framework as unhealthy. That keeps the accountability in the right place. The team should fix capture hooks, artifact upload, redaction rules, or naming conventions instead of asking every tester to remember manual steps.
A practical quality gate can be this direct:
- Block release checks when critical evidence is missing.
- Warn on low-risk monitoring runs when screenshots are missing.
- Fail fast when defect summaries have no expected or actual result.
- Open a framework ticket when 3 runs in a week miss the same artifact.
Track trends, not only failures
The checklist also gives managers useful signals. If 40% of failures come from ambiguous locators, fix locator strategy. If 30% of failures show environment instability, fix test data and staging health. If screenshots frequently show cookie banners or feature flags, update the skill setup step. Evidence is not only for debugging one failed run. It becomes the data set for improving the automation system.
India QA Team Context
This becomes an interview signal
In India, many QA engineers are moving from manual testing or Selenium-only automation toward Playwright, AI agents, and CI ownership. Product companies increasingly ask for engineers who can debug systems, not only write locators. A candidate who can explain an AI browser agent evidence checklist stands out.
For mid-level SDETs targeting ₹15-25 LPA roles, this is a practical differentiator. For senior SDETs and leads targeting ₹25-40 LPA roles, it is close to mandatory. You need to show how automation output becomes release evidence.
TCS or Infosys style teams need this too
Large service-company teams often run many browser tests but struggle with ownership. A failed test moves between QA, frontend, backend, and environment teams. AI agents can make that worse if the output is vague. The checklist gives those teams a shared artifact that travels with the defect.
Product teams can move faster
Product teams care about cycle time. A good evidence package cuts the first triage loop. Instead of asking “can you reproduce?” the engineer opens the trace, sees the DOM slice, checks the screenshot, and starts debugging. That is where AI browser testing becomes useful instead of theatrical.
Key Takeaways
An AI browser agent evidence checklist is not optional for serious QA teams. It is the difference between a demo and a system people trust.
- Capture the exact instruction so every run has a clear audit trail.
- Record the DOM slice that proves what the agent clicked, read, or extracted.
- Attach screenshots for visual proof, but mask sensitive data.
- Use Playwright traces for replay when a result is surprising or high-risk.
- Write defect summaries in a format humans can triage and tools can parse.
If you are building AI browser workflows with BrowsingBee, start with 3 critical skills this week. Add the 5 evidence artifacts. Fail the run when evidence is missing. That one rule will improve trust faster than another prompt tweak.
FAQ
What is an AI browser agent evidence checklist?
An AI browser agent evidence checklist is a standard set of artifacts captured for each agent run. For BrowsingBee-style workflows, I recommend the instruction, DOM state, screenshot, trace, and defect summary.
Do all BrowsingBee runs need a trace file?
No. Use full trace for high-risk flows, first runs after skill changes, failures, and retries. For routine monitoring, a DOM slice, screenshot, and summary may be enough.
Is a screenshot enough evidence for AI browser testing?
No. A screenshot shows visual state, but it does not prove which element the agent selected or which value it extracted. Pair screenshots with DOM evidence and a trace when the workflow matters.
How does this connect to Playwright?
Playwright already has strong evidence tools: traces, screenshots, locators, reporters, and test artifacts. BrowsingBee teams can borrow that proven evidence mindset for AI browser agent workflows.
What should QA leads implement first?
Start with 3 business-critical skills, add the 5 required artifacts, upload evidence from CI, and review every high-risk failure. Do not try to instrument 30 skills on day 1.
Sources checked: BrowsingBee homepage, Playwright Trace Viewer docs, Playwright screenshot docs, Playwright locator docs, Playwright reporter docs, GitHub repository API, and npm downloads API.