Playwright Visual Regression Testing with TypeScript
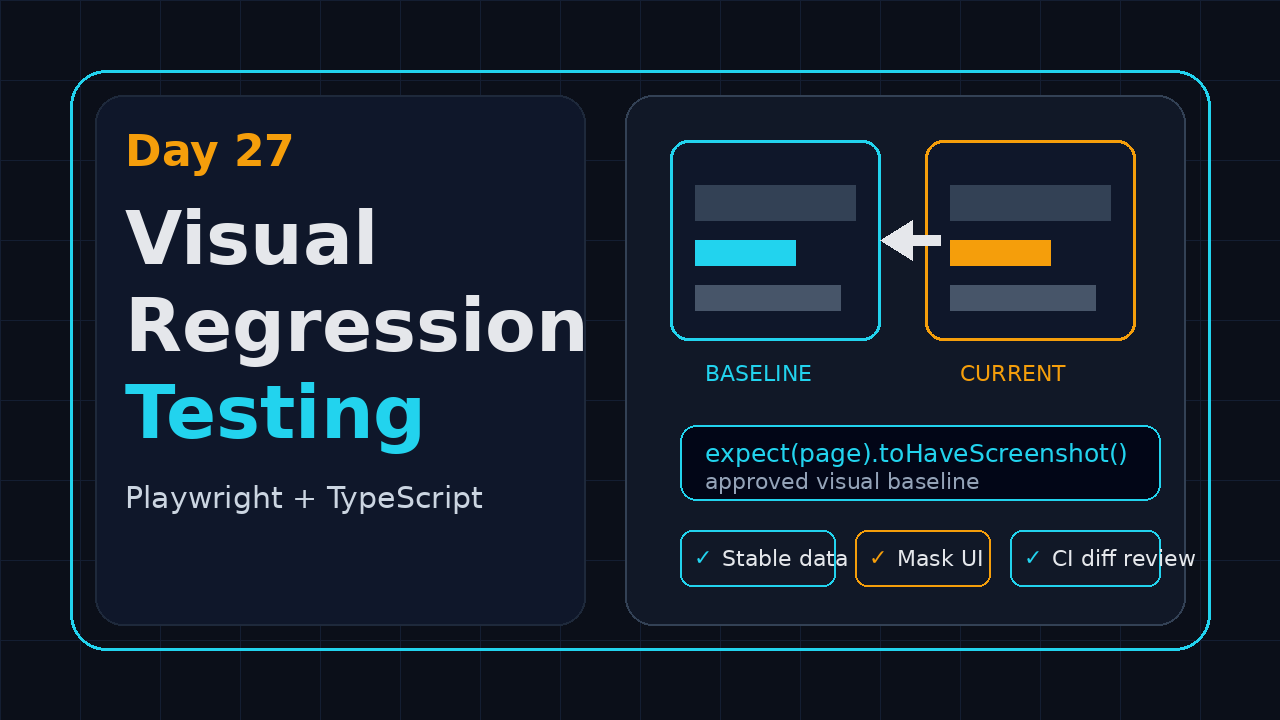
Playwright visual regression testing is where screenshots stop being decoration and start becoming release gates. In Day 27 of this Playwright + TypeScript series, I show the exact setup I use for stable screenshot baselines, pull request review, and CI failures that point to real UI changes instead of random pixels.
Table of Contents
- Why Playwright Visual Regression Testing Matters
- Project Setup for Screenshot Baselines
- Writing Your First Visual Tests
- How to Stabilize Screenshots Before Comparing
- CI Workflow for Visual Regression Testing
- Reviewing and Updating Baselines
- Common Pitfalls I See in Teams
- A Framework Pattern You Can Reuse
- FAQ
Contents
Why Playwright Visual Regression Testing Matters
Most UI bugs do not start as broken buttons. They start as small visual shifts: a hidden validation message, a clipped card, a missing icon, a mobile layout that still passes every locator assertion.
This is why Playwright visual regression testing belongs in a serious TypeScript framework. Your functional tests answer one question: does the workflow still work? Your visual tests answer a different question: does the workflow still look safe for the user?
Playwright has first-class screenshot comparison through snapshot testing and visual comparisons. The official docs describe how await expect(page).toHaveScreenshot() creates reference screenshots on the first run and compares later runs against those references. That makes the feature practical for normal QA teams, not only frontend platform teams.
Functional assertions miss visual bugs
A checkout test can click the Pay button and still miss these defects:
- The price is present but hidden under a sticky footer.
- The coupon error message renders in white on a white background.
- The mobile navigation opens behind the modal overlay.
- The product image loads but is stretched to the wrong aspect ratio.
Locator assertions are still required. I do not replace them with screenshots. I pair them with screenshot checks on pages where visual trust matters: checkout, pricing, login, account dashboard, analytics, admin forms, and public landing pages.
The scale argument is real
As of my research for this post, the npm registry reports @playwright/test version 1.61.1, and the npm downloads API reported more than 184 million downloads for the last month. The Microsoft Playwright GitHub repository also shows more than 93,000 stars. I do not treat stars as quality proof, but they show that the ecosystem is large enough for a long-term automation investment.
For context inside this series, pair this tutorial with Playwright Component Testing with TypeScript and Playwright Performance Testing with TypeScript. Visual checks catch layout regressions. Component tests catch isolated UI behavior. Performance checks catch slow pages. Together, they give a better release signal than one long end-to-end suite.
Project Setup for Screenshot Baselines
Start with a normal Playwright TypeScript project. If you already followed the earlier days, use the same repo. If not, create a clean one:
mkdir pw-visual-regression
cd pw-visual-regression
npm init -y
npm init playwright@latest
Choose TypeScript, install browsers, and keep the default tests folder. I usually add a dedicated folder for visual specs so the intent is obvious:
mkdir -p tests/visual
mkdir -p tests/fixtures
mkdir -p tests/helpers
Recommended folder structure
A simple structure works better than a clever one:
pw-visual-regression/
  playwright.config.ts
  tests/
    visual/
      home.visual.spec.ts
      checkout.visual.spec.ts
    helpers/
      visual.ts
    fixtures/
      auth-state.json
  test-results/
  playwright-report/
Playwright stores screenshot snapshots next to the spec by default. That means a test file named home.visual.spec.ts gets a snapshot folder near it. This is good for code review because the test and its approved screenshot move together.
Baseline policy before code
Do not start by writing 80 visual tests. Start by writing a policy. I use this checklist:
- Pick 5 to 10 high-value screens first.
- Run baselines only on one operating system in CI.
- Use one browser for the first version, usually Chromium.
- Freeze data, time, animations, and network responses where possible.
- Require human review for baseline updates.
This keeps the suite small enough to trust. A noisy screenshot suite gets ignored faster than a flaky login test.
Writing Your First Visual Tests
The first test should be boring. Do not start with a page full of charts, ads, carousels, and dynamic dates. Start with a deterministic page like login, settings, or a static product detail screen.
import { test, expect } from '@playwright/test';

test.describe('Home page visual checks', () => {
  test('home page hero matches approved baseline', async ({ page }) => {
    await page.goto('/');
    await expect(page.getByRole('heading', { name: /quality/i })).toBeVisible();

    await expect(page).toHaveScreenshot('home-page.png', {
      fullPage: true,
      animations: 'disabled',
    });
  });
});
The important point is the assertion before the screenshot. I first prove the page reached the expected state. Then I compare the pixels. Without that assertion, a screenshot failure may only tell you that the page was still loading.
Use named screenshots
Always name screenshots. A name like home-page.png is reviewable. A generated snapshot name buried inside a diff is harder to discuss in a pull request.
I prefer this naming style:
login-empty-state.pnglogin-validation-errors.pngcheckout-summary-desktop.pngcheckout-summary-mobile.png
Test viewport-specific layouts
Visual bugs often appear only at a specific viewport. I usually test one desktop width and one mobile width for money pages:
import { test, expect } from '@playwright/test';

test('pricing page desktop and mobile baselines', async ({ page }) => {
  await page.setViewportSize({ width: 1440, height: 900 });
  await page.goto('/pricing');
  await expect(page.getByRole('heading', { name: /pricing/i })).toBeVisible();
  await expect(page).toHaveScreenshot('pricing-desktop.png', { fullPage: true });

  await page.setViewportSize({ width: 390, height: 844 });
  await page.reload();
  await expect(page.getByRole('heading', { name: /pricing/i })).toBeVisible();
  await expect(page).toHaveScreenshot('pricing-mobile.png', { fullPage: true });
});
This is not a replacement for responsive component tests. It is a guardrail for real rendered pages.
How to Stabilize Screenshots Before Comparing
Bad visual tests fail for random reasons. Good visual tests fail because the user interface changed. The difference comes from stabilization.
Disable animations
Animations create false diffs. Playwright’s screenshot assertion supports disabling animations. I enable it for full-page comparisons:
await expect(page).toHaveScreenshot('dashboard.png', {
  fullPage: true,
  animations: 'disabled',
});
If your app uses skeleton loaders, spinners, or animated charts, wait for the final business state before taking the screenshot.
Mask dynamic elements
Some pixels change every run: timestamps, user avatars, random IDs, rotating banners, and ad slots. Do not compare them. Mask them.
await expect(page).toHaveScreenshot('account-summary.png', {
  fullPage: true,
  mask: [
    page.getByTestId('last-login-time'),
    page.getByTestId('user-avatar'),
    page.locator('[data-testid="promo-banner"]'),
  ],
});
Masking is not cheating. It is scope control. You are saying, “this dynamic region is not part of the visual contract for this test.”
Freeze time in the browser
Playwright’s docs include a guide for clock control. When the UI displays relative time like “2 minutes ago” or a date picker opens on the current day, clock control makes screenshots repeatable.
import { test, expect } from '@playwright/test';

test('invoice page with fixed date', async ({ page }) => {
  await page.clock.setFixedTime(new Date('2026-07-18T09:00:00+05:30'));
  await page.goto('/invoice/INV-1001');

  await expect(page.getByText('INV-1001')).toBeVisible();
  await expect(page).toHaveScreenshot('invoice-fixed-date.png', {
    fullPage: true,
  });
});
Mock unstable API responses
If a card count changes because staging data changed, the screenshot test is not stable. Mock the API for visual tests:
test('dashboard summary visual baseline', async ({ page }) => {
  await page.route('**/api/dashboard/summary', async route => {
    await route.fulfill({
      status: 200,
      contentType: 'application/json',
      body: JSON.stringify({
        openBugs: 12,
        passedTests: 248,
        failedTests: 3,
        releaseRisk: 'Medium',
      }),
    });
  });

  await page.goto('/dashboard');
  await expect(page.getByText('Medium')).toBeVisible();
  await expect(page).toHaveScreenshot('dashboard-summary.png', { fullPage: true });
});
This connects with the approach from Database Seeding for E2E Tests via API in Playwright. For visual tests, the data setup is not optional. It is the difference between a trusted gate and a random failure generator.
CI Workflow for Playwright Visual Regression Testing
Playwright visual regression testing becomes serious only when it runs in CI. Local screenshots are useful for development, but the release gate must be consistent.
Use a single CI image first
Fonts, operating systems, GPU behavior, and browser versions can shift pixels. I recommend this rule for the first month: generate and compare baselines in the same Linux CI environment.
Here is a GitHub Actions example:
name: visual-regression

on:
  pull_request:
    branches: [main]

jobs:
  visual:
    runs-on: ubuntu-latest
    steps:
      - uses: actions/checkout@v4
      - uses: actions/setup-node@v4
        with:
          node-version: 22
          cache: npm
      - run: npm ci
      - run: npx playwright install --with-deps chromium
      - run: npx playwright test tests/visual --project=chromium
      - uses: actions/upload-artifact@v4
        if: always()
        with:
          name: visual-test-results
          path: |
            test-results
            playwright-report
If you run tests on developer laptops and CI with different baselines, you will waste time. Keep the baseline authority in CI.
Keep visual tests separate from smoke tests
I do not put visual checks in every smoke spec. I create a separate suite:
{
  "scripts": {
    "test:smoke": "playwright test tests/smoke",
    "test:visual": "playwright test tests/visual --project=chromium",
    "test:visual:update": "playwright test tests/visual --update-snapshots --project=chromium"
  }
}
This lets the team run smoke tests quickly and run visual checks when the change touches UI. In product companies, this split also helps frontend developers adopt the suite because they can run the relevant command without executing the entire regression pack.
Reviewing and Updating Baselines
The biggest mistake is treating baseline updates as a mechanical command. A baseline update is a product decision. Someone must look at the diff and decide whether the change is expected.
The review rule I use
Every visual diff gets one of three decisions:
- Expected change: update the baseline in the same pull request.
- Unexpected product bug: fix the UI, do not update the baseline.
- Test noise: stabilize the test with masking, fixed data, or better waits.
This language matters. It stops teams from saying, “visual test failed, update snapshot.” That habit kills the value of the suite.
Screenshot descriptions for reports
When I add a screenshot to a test report, I write a short description in the test title or annotation. Example:
test('checkout summary keeps price, tax, and CTA visible on mobile', async ({ page }) => {
  test.info().annotations.push({
    type: 'screenshot-description',
    description: 'Mobile checkout card showing price, tax, delivery fee, and Pay button above the fold.',
  });

  await page.setViewportSize({ width: 390, height: 844 });
  await page.goto('/checkout');
  await expect(page.getByRole('button', { name: /pay/i })).toBeVisible();
  await expect(page).toHaveScreenshot('checkout-summary-mobile.png');
});
This helps reviewers understand what the screenshot is supposed to protect. It also helps junior SDETs learn visual testing as a risk-based activity, not a screenshot collection exercise.
Common Pitfalls I See in Teams
Most teams do not fail at Playwright visual regression testing because the tool is weak. They fail because the operating model is weak.
Pitfall 1: Comparing the whole app
Do not take full-page screenshots of every screen on Day 1. Start with risk:
- Revenue screens like pricing and checkout.
- Trust screens like login, password reset, and account security.
- High-traffic public pages.
- Complex UI states like empty, loading, error, and permission denied.
In India-based service teams, I often see managers ask for 100 percent automation coverage. That target sounds strong in a status meeting, but it creates weak automation. For visual regression, 15 strong baselines are better than 150 noisy ones.
Pitfall 2: Ignoring fonts and assets
If fonts load from the network, the first screenshot may capture fallback text. Wait for fonts and important images when the UI depends on them:
await page.goto('/landing');
await page.evaluate(async () => {
  await document.fonts.ready;
});
await expect(page.locator('img[alt="Product dashboard"]')).toBeVisible();
await expect(page).toHaveScreenshot('landing-ready.png', { fullPage: true });
Pitfall 3: Updating snapshots without a diff review
The command --update-snapshots is powerful. It is also dangerous. I allow it only after the diff is reviewed. In a mature team, the pull request must show why the visual change is expected.
Pitfall 4: Using visual tests for text validation
Do not use screenshots to check exact text. Use locator assertions for text and screenshots for layout. This keeps failures readable:
await expect(page.getByText('Payment successful')).toBeVisible();
await expect(page.getByRole('button', { name: 'Download invoice' })).toBeVisible();
await expect(page).toHaveScreenshot('payment-success-layout.png');
A Framework Pattern You Can Reuse
Once visual tests grow beyond 5 screens, create a helper. Do not hide Playwright behind a giant abstraction. Just centralize the stabilization steps.
// tests/helpers/visual.ts
import { expect, Page, Locator } from '@playwright/test';

type VisualOptions = {
  name: string;
  fullPage?: boolean;
  mask?: Locator[];
};

export async function expectStableScreenshot(
  page: Page,
  options: VisualOptions,
) {
  await page.evaluate(async () => {
    await document.fonts.ready;
  });

  await page.locator('[data-testid="global-loader"]').waitFor({
    state: 'hidden',
    timeout: 10_000,
  }).catch(() => undefined);

  await expect(page).toHaveScreenshot(options.name, {
    fullPage: options.fullPage ?? true,
    animations: 'disabled',
    mask: options.mask ?? [],
  });
}
Now your spec stays readable:
import { test, expect } from '@playwright/test';
import { expectStableScreenshot } from '../helpers/visual';

test('profile settings visual baseline', async ({ page }) => {
  await page.goto('/settings/profile');
  await expect(page.getByRole('heading', { name: 'Profile settings' })).toBeVisible();

  await expectStableScreenshot(page, {
    name: 'profile-settings.png',
    mask: [page.getByTestId('last-saved-time')],
  });
});
Configuration I prefer
Keep visual tests on a predictable project in playwright.config.ts:
import { defineConfig, devices } from '@playwright/test';

export default defineConfig({
  testDir: './tests',
  use: {
    baseURL: process.env.BASE_URL ?? 'http://localhost:3000',
    trace: 'on-first-retry',
    screenshot: 'only-on-failure',
  },
  projects: [
    {
      name: 'chromium',
      use: { ...devices['Desktop Chrome'] },
    },
  ],
});
If you already built a configurable framework like Multi-Environment Configuration in Playwright, add this visual helper as a thin layer. Do not rebuild your framework around screenshots.
Team Rollout Plan for the Next 7 Days
If I were introducing Playwright visual regression testing in a new SDET team, I would not announce a big framework rewrite. I would run a 7-day rollout and prove value with a small, visible win.
Day 1 to Day 2: pick the screens
Ask product, design, support, and QA for screens where visual defects create real customer pain. Do not ask for every screen. Ask for the top 5. In most teams, the answer is predictable: login, checkout, pricing, reports, and settings.
Day 3 to Day 5: create deterministic data
Build the mocks, API seeds, or database records needed for stable screenshots. If the data is not stable, the screenshots will not be stable. This is where senior SDETs add value because they understand both test design and product risk.
Day 6 to Day 7: wire CI and review rules
Add the visual suite to pull requests, upload the Playwright report as an artifact, and document the review rule in the repo. A simple VISUAL_TESTING.md file is enough:
# Visual Testing Rules

1. Review the diff before updating snapshots.
2. Update baselines only for expected UI changes.
3. Stabilize noisy areas with masks or fixed data.
4. Keep the first suite under 10 screenshots.
5. Add a product note when a visual change is intentional.
This is also a career signal. A manual tester moving into automation can own this layer and become useful quickly. In India, I see strong SDET roles around ₹25-40 LPA expect this kind of release ownership, not only script writing.
FAQ
Is Playwright visual regression testing enough without functional tests?
No. Visual checks tell you that the UI still matches an approved baseline. They do not prove business logic. Keep API checks, locator assertions, and workflow tests. Add screenshots where layout risk is high.
Should I run visual tests in all browsers?
Not at the start. Begin with Chromium in CI. Add WebKit or Firefox only for screens where browser-specific rendering matters. More browsers mean more baselines and more review work.
How often should I update baselines?
Update baselines only when the UI change is expected and reviewed. If your team updates snapshots every day without looking at diffs, the suite is not protecting the product.
What is a good first target for visual tests?
Pick checkout, login, pricing, dashboard, or a high-traffic landing page. Avoid highly dynamic pages until your stabilization pattern is strong.
Key Takeaways
Playwright visual regression testing works best when you treat screenshots as product contracts, not random artifacts. The focus keyword for this tutorial is practical for SEO, but the core lesson is operational: visual quality needs ownership.
- Use
toHaveScreenshot()for high-value screens, not every page. - Stabilize screenshots with fixed data, masked dynamic regions, disabled animations, and fixed time.
- Run baselines in one CI environment before expanding browser coverage.
- Review every diff as expected change, product bug, or test noise.
- Keep helpers thin so the team still understands the Playwright API.
Day 27 is the point where the framework starts acting like a release gate. If your team already has solid functional Playwright tests, visual regression is the next practical layer to add.