Playwright Screenshots and Video Recording in TypeScript
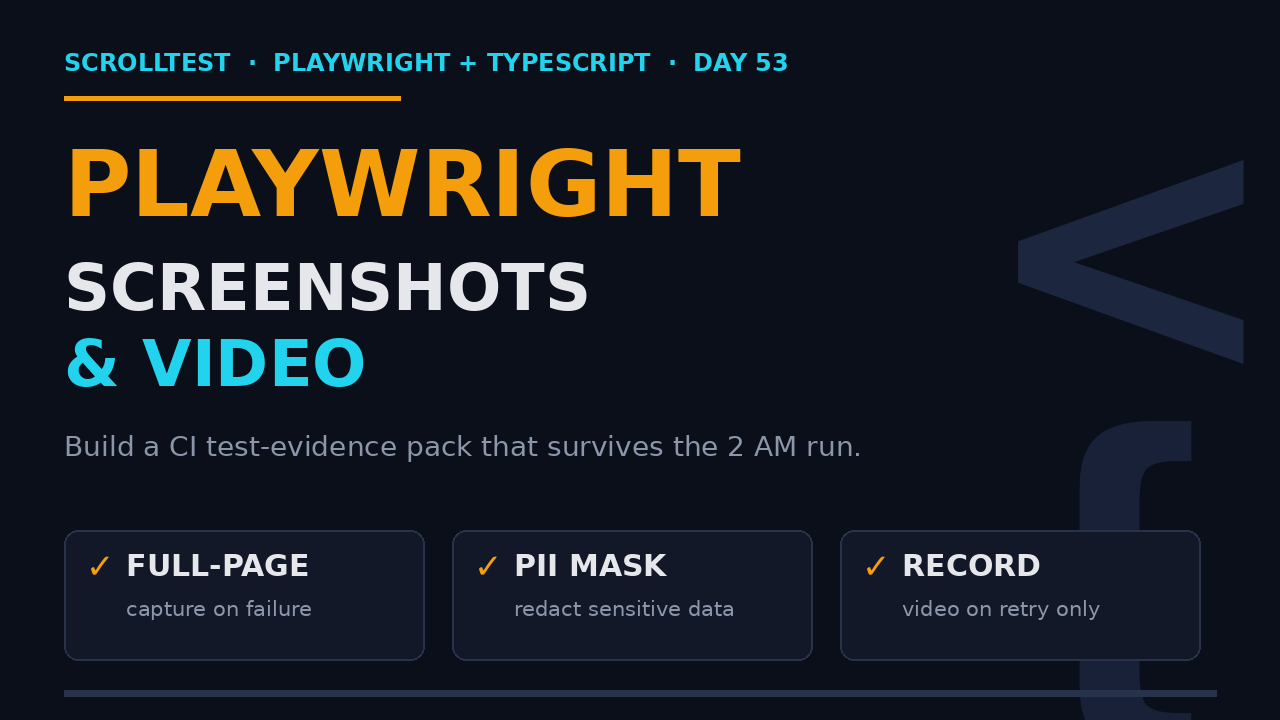
Most Playwright test failures end the same way: a red line in CI, a stack trace nobody opens, and a Slack thread asking “what did the page actually look like?” The fix is not another assertion. It is Playwright screenshots and video recording, wired in so every failed run ships its own evidence pack. In this guide I show you the full TypeScript workflow: full-page, viewport, and element screenshots, masking PII, recording videos on retry only, and uploading the whole thing to CI so your team actually watches the failure instead of guessing at it.
Table of Contents
- Why Screenshots and Video Beat a Stack Trace
- Screenshot Basics with page.screenshot() in TypeScript
- Full-Page vs Viewport vs Element Screenshots
- Masking Sensitive Data in Screenshots
- Video Recording with recordVideo
- Wiring Evidence into CI with GitHub Actions
- Screenshot vs Video vs Trace: A Decision Guide
- Seven Pitfalls That Ruin Your Evidence Pack
- India Context: Evidence Packs in SDET Interviews
- Key Takeaways
- FAQ
Contents
Why Playwright Screenshots and Video Beat a Stack Trace
A stack trace tells you the line that threw. A screenshot shows you what the user actually saw the moment it threw. That difference is the whole reason I push every team I work with to capture visual evidence on failure.
Playwright is now the default way teams do this. The microsoft/playwright repository sits at 94,596 GitHub stars, and @playwright/test pulls about 201 million downloads a month from npm. That scale matters for two reasons: the screenshot and video APIs are battle-tested, and every hiring manager you meet has almost certainly seen them running inside a CI pipeline before.
Here is the situation I see every week. A test fails at step 14 of 20. The assertion says expected "Order confirmed" to be visible. The stack trace points at a expect() call. None of that tells you whether the button never rendered, the page crashed mid-checkout, a cookie banner covered the text, or the payment iframe never loaded. A single full-page screenshot at the failure point answers all four questions in two seconds.
Video adds the missing dimension: time. Screenshots are still frames. A recording shows you the sequence of renders, the redirect, the toast that flashed and disappeared. When a flaky test passes locally but fails in CI, the video is usually the only artifact that exposes the race. My team cut average flaky-failure triage from roughly 25 minutes to under 5 once we stopped reading stack traces first and started watching the recording first.
What an evidence pack should contain
- A full-page screenshot at the moment of failure
- An element screenshot of the exact selector that failed
- A video of the full test run (ideally on retry only)
- A trace file for deep dives into network and DOM state
Playwright makes all four near-free to configure. The rest of this article is the setup, in TypeScript, that I use in production.
Playwright Screenshots Basics with page.screenshot() in TypeScript
The core API is page.screenshot(). The one-liner below captures the current viewport and writes a PNG to disk. The full reference lives in the official screenshots guide, but the options I list next are the ones that solve real problems.
import { test, expect } from '@playwright/test';

test('capture a basic viewport screenshot', async ({ page }) => {
  await page.goto('https://scrolltest.com/');
  await page.screenshot({ path: 'artifacts/homepage.png' });
});
This saves a PNG of exactly what is visible in the default viewport (1280×720 by default in Playwright). The most useful options you will reach for right away:
path: where the file goes. Always put it in an ignoredartifacts/ortest-results/folder so you do not commit screenshots to git.fullPage: set totrueto capture the entire scrollable page, not just the viewport.type:png(default) orjpeg. Use jpeg when file size matters and you do not need transparency.quality: 0-100, jpeg only. Controls compression.animations: set to'disabled'to freeze CSS animations and transitions so the capture is stable.mask: an array of locators to paint over (covered in a later section).
I set animations: 'disabled' on nearly every screenshot. An element that is mid-fade when the capture fires looks broken even when it is not. The option makes the frame deterministic.
await page.screenshot({
  path: 'artifacts/homepage-full.png',
  fullPage: true,
  animations: 'disabled',
});
Capture on failure automatically
You do not want a screenshot on every passing test. You want one on every failure. Playwright gives you a testInfo object in every hook, and it tells you whether the test failed.
import { test } from '@playwright/test';

test.afterEach(async ({ page }, testInfo) => {
  if (testInfo.status !== 'passed') {
    await page.screenshot({
      path: `artifacts/${testInfo.title.replace(/\s+/g, '-')}.png`,
      fullPage: true,
      animations: 'disabled',
    });
  }
});
Put this in a shared fixture or a base test file and every failed test in the suite gets a screenshot with a filename you can trace back to the test name. This is the single highest-impact line of code in this article.
Full-Page vs Viewport vs Element Screenshots
Not every failure needs a full-page capture. Pick the right scope or your artifact folder turns into a gigabyte landfill.
Full-page screenshots
Use fullPage: true when the failure involves layout, content below the fold, or a long form. It scrolls and stitches the entire document into one tall image. Two things to watch: lazy-loaded images below the fold may not have loaded yet, and very long pages produce very tall images that are hard to read in a chat preview.
Viewport screenshots
The default. Use it to answer “what did the user see at this exact size?” Set an explicit viewport so your capture matches the responsive breakpoint you care about.
test.use({ viewport: { width: 390, height: 844 } }); // iPhone 14 size

test('mobile viewport capture', async ({ page }) => {
  await page.goto('https://scrolltest.com/');
  await page.screenshot({ path: 'artifacts/mobile-home.png' });
});
Element screenshots
When the failing assertion is on one element, screenshot that element. It crops to the element’s bounding box and keeps the artifact small and specific.
const checkout = page.locator('#checkout-summary');
await expect(checkout).toBeVisible();
await checkout.screenshot({ path: 'artifacts/checkout-summary.png' });
Screenshot description: A side-by-side of the three capture scopes. Left: a tall full-page PNG of a checkout flow. Middle: a 390×844 mobile viewport PNG. Right: a small element PNG cropped to the order summary card. The element capture is the one your teammate opens first.
The clip option for partial captures
If you want a region without holding a locator, use clip with explicit coordinates.
await page.screenshot({
  path: 'artifacts/hero-only.png',
  clip: { x: 0, y: 0, width: 1280, height: 400 },
});
clip is viewport-relative, not page-relative, so use it after you have scrolled to the right position, or prefer element screenshots whenever a locator exists.
Masking Sensitive Data in Screenshots
The first time a QA team ships a screenshot with a customer’s email or a test credit card number in it, trust takes a hit. Playwright’s mask option paints solid boxes over any locator you pass, before the pixel ever lands in the file.
await page.screenshot({
  path: 'artifacts/account-masked.png',
  fullPage: true,
  mask: [
    page.locator('#user-email'),
    page.locator('.card-number'),
    page.locator('input[type="password"]'),
    page.locator('.otp-field'),
  ],
});
The masked areas render as solid gray boxes by default. You can change the color with maskColor if your design makes gray hard to see.
await page.screenshot({
  path: 'artifacts/account-masked.png',
  mask: [page.locator('#user-email')],
  maskColor: '#0B0F19',
});
Why this matters in practice
I work with fintech and health product teams where the screenshot artifact gets forwarded to a shared Slack channel or attached to a Jira ticket. A bug report with masked PII ships in minutes. A bug report with an unmasked email has to be redacted by hand, or worse, gets blocked by a security reviewer. Mask at capture time and you never have to think about it again.
Build the mask list once, in a fixture, and reuse it across every test. Keep it in sync with your product’s actual PII fields: email, phone, address, card number, OTP, government ID, and any avatar that could identify a real user.
One clarification I give new testers: masking only changes the pixels in the screenshot. It does not hide the element from the test, does not change assertions, and does not remove the value from the DOM. Your test keeps running against the real element; only the image is redacted.
Video Recording with recordVideo
Screenshots capture the moment. Video captures the sequence. In Playwright you turn on recording with recordVideo, either in the config for the whole project or per context. The full reference is in the official videos guide.
Config-level recording
import { defineConfig } from '@playwright/test';

export default defineConfig({
  use: {
    recordVideo: { dir: 'test-results/videos' },
  },
});
Recording only the first retry
Recording every test every run burns disk and CI minutes for zero value. Record only when it matters: on the retry of a failing test. Playwright gives you a ready-made option.
import { defineConfig } from '@playwright/test';

export default defineConfig({
  retries: process.env.CI ? 2 : 0,
  use: {
    recordVideo: { dir: 'test-results/videos', size: { width: 1280, height: 720 } },
    trace: 'on-first-retry',
  },
});
There is no video: 'on-first-retry' flag the way there is for traces, so if you want retry-only video, set it at the context level inside the test.
import { test, expect } from '@playwright/test';

test('checkout flow records on retry only', async ({ browser }) => {
  const context = await browser.newContext({
    recordVideo: {
      dir: 'test-results/videos',
      size: { width: 1280, height: 720 },
    },
  });
  const page = await context.newPage();
  await page.goto('https://scrolltest.com/');
  // ... test steps ...
  await expect(page.locator('#order-confirmed')).toBeVisible();
  await context.close();
});
Two details matter here. First, always call context.close() (or page.close()) at the end so the video is finalized and flushed to disk. If you skip it, the .webm file can be empty or truncated. Second, the video saves as .webm (VP8/VP9), which every modern browser plays but some corporate viewers and older players do not. If your team shares videos to a tool that cannot open webm, re-encode with ffmpeg in CI.
Screenshot description: The Playwright HTML report showing a failed test row with a play button. Clicking the row opens a video scrubber where the tester drags the timeline to the exact second the page redirected to an error screen. This is the moment video beats a stack trace.
Video with storage state
One gotcha: if you reuse a storageState for authentication, record the video on the context that performs the real navigation, not the global setup, or you end up with a recording of the login page and nothing else. Recording is per-context, and a context created from storage state records from the moment it launches.
Wiring Evidence into CI with GitHub Actions
Artifacts that only exist on a developer laptop are useless. The whole point is that CI keeps them after the run so the person who wakes up to the failure can open them. Here is the GitHub Actions step I use.
name: Playwright Tests

on: [push, pull_request]

jobs:
  test:
    runs-on: ubuntu-latest
    steps:
      - uses: actions/checkout@v4
      - uses: actions/setup-node@v4
        with:
          node-version: 20
      - run: npm ci
      - run: npx playwright install --with-deps
      - run: npx playwright test
        continue-on-error: true
      - uses: actions/upload-artifact@v4
        if: always()
        with:
          name: playwright-evidence
          path: |
            test-results/
            artifacts/
          retention-days: 14
Three decisions worth copying:
continue-on-error: trueso the upload step runs even when the test step fails. Without it, a failing suite skips the artifact upload and you lose exactly the evidence you needed.if: always()on the upload step for the same reason.retention-days: 14so old videos get cleaned up instead of silently eating your Actions storage quota.
Name artifacts so a stranger can find the failure
If every screenshot is named screenshot.png, your evidence pack is a pile of identical filenames. Derive names from the test, the project, and the attempt. Playwright already writes videos into per-test subfolders under the recordVideo directory, so keep your manual screenshots on the same convention: ${testInfo.project.name}-${testInfo.title}, sanitized. When the 2 AM failure gets forwarded to a Slack channel, the filename alone tells the reader which test and which browser failed.
Once artifacts are in CI, link them into your test-reporting or Slack notification flow. A failure alert that says “download the evidence pack here” is worth ten alerts that only paste the stack trace.
Screenshot vs Video vs Trace: A Decision Guide
Teams overpay by capturing everything everywhere. Each artifact has a job, and they do not overlap as much as people assume.
- Screenshot: the state at one moment. Cheapest to store, fastest to scan. Use it for the failure frame, PII masking, and visual verification.
- Video: the sequence over time. Use it for races, redirects, animations, and anything where the order of events is the bug.
- Trace: the full DOM snapshot, network calls, console logs, and action timeline. Use it when the screenshot and video do not explain the root cause and you need to inspect state under the hood. See my Trace Viewer debugging guide for the deep dive.
My default policy for a mid-size suite: screenshot on failure always, video on first retry only, trace on first retry only. That gives you full coverage for the 5% of runs that fail without taxing the 95% that pass.
Seven Pitfalls That Ruin Your Evidence Pack
- Capturing mid-animation. An element fading in looks broken in a still. Set
animations: 'disabled'on screenshots. - Full-page screenshots missing lazy content. Images and sections that load on scroll may be blank. Scroll or wait for them before capturing.
- Unmasked PII. Ship a screenshot with an email or card number once and a security review will slow you down for a week. Mask at capture time.
- Video bloat. Recording every passing test fills your artifact bucket. Use retry-only recording or a short retention window.
- Forgetting to close the context. An unclosed context leaves a truncated or empty
.webm. Alwaysawait context.close(). - webm playback gaps. Some viewers cannot open VP8/VP9 video. Re-encode to mp4 with ffmpeg if your team’s tooling needs it.
- Committing artifacts to git. Add
test-results/andartifacts/to.gitignoreon day one, or your repo size will creep upward for no reason.
India Context: Evidence Packs in SDET Interviews
If you are a QA engineer in India interviewing for an SDET role, this specific skill is an interview differentiator. Senior SDET roles at product companies pay roughly ₹15-35 LPA depending on city and company tier, and the gap between a ₹12 LPA service-company profile and a ₹25 LPA product profile is often exactly this: does the candidate think about evidence, CI integration, and failure triage, or only about writing a passing script?
When I interview, I ask one question that separates them fast: “A test failed in CI at 2 AM and passed when you reran it locally. What do you do?” The strong answer starts with “I look at the screenshot and video artifacts the CI run captured.” The weak answer starts with “I add more waits.” Hiring managers notice which one you are.
Two practical ways to put this on your resume and in your interviews:
- Build a small project that captures screenshots on failure, records video on retry, masks PII, and uploads artifacts to GitHub Actions. Link it from your resume.
- Be ready to explain the tradeoff between screenshot, video, and trace, and which one you reach for first. That one minute of explanation is worth more than a hundred LeetCode-style test questions.
This is also the exact workflow behind the AI test-evidence packs I cover in the broader AI testing series, where an agent writes the bug report and attaches the visual proof automatically. Same instinct, one more layer of automation.
Key Takeaways
Playwright screenshots and video recording are not extras. They are the difference between a failure you diagnose in minutes and one that eats an afternoon. Here is the checklist to copy into your own project.
- Capture a full-page screenshot on every failed test with a shared
afterEachhook, keyed totestInfo.status. - Pick the right scope: full-page for layout, viewport for responsive, element for the failing selector.
- Mask PII at capture time with the
maskoption so screenshots are safe to share. - Record video on retry only, always close the context, and re-encode webm if your team’s viewer needs mp4.
- Upload evidence to CI with
continue-on-errorand a retention window, so the 2 AM failure is diagnosable at 9 AM. - In SDET interviews, lead with your evidence-and-triage story. It is what separates a ₹15 LPA profile from a ₹25 LPA one.
FAQ
How do I take a full-page screenshot in Playwright with TypeScript?
Pass fullPage: true to page.screenshot(). Add animations: 'disabled' so CSS transitions do not produce a blurry or half-rendered capture, and set a path inside an ignored artifacts folder.
Can Playwright record test videos?
Yes. Set recordVideo: { dir: 'test-results/videos' } in the config or on a browser context. Videos save as .webm and are finalized when you call context.close().
How do I hide sensitive data like emails or passwords in a screenshot?
Use the mask option with an array of locators. Playwright paints solid boxes over those elements before writing the image. You can change the color with maskColor.
Should I record video for every test?
No. Recording every passing test wastes disk and CI time. Record on the first retry of a failing test, or use a short retention window like 14 days in CI.
What is the difference between a Playwright screenshot, video, and trace?
A screenshot is one frame, a video is the sequence over time, and a trace is the full DOM, network, and console state for root-cause debugging. Use screenshot for the failure frame, video for timing bugs, and trace when the first two do not explain the cause.
For a deeper look at the debugging side of this workflow, read my Playwright debugging guide, and for the isolation model that keeps your evidence clean across parallel runs, see browser contexts and test isolation. If you are still deciding between frameworks, start with Playwright vs Selenium in 2026.